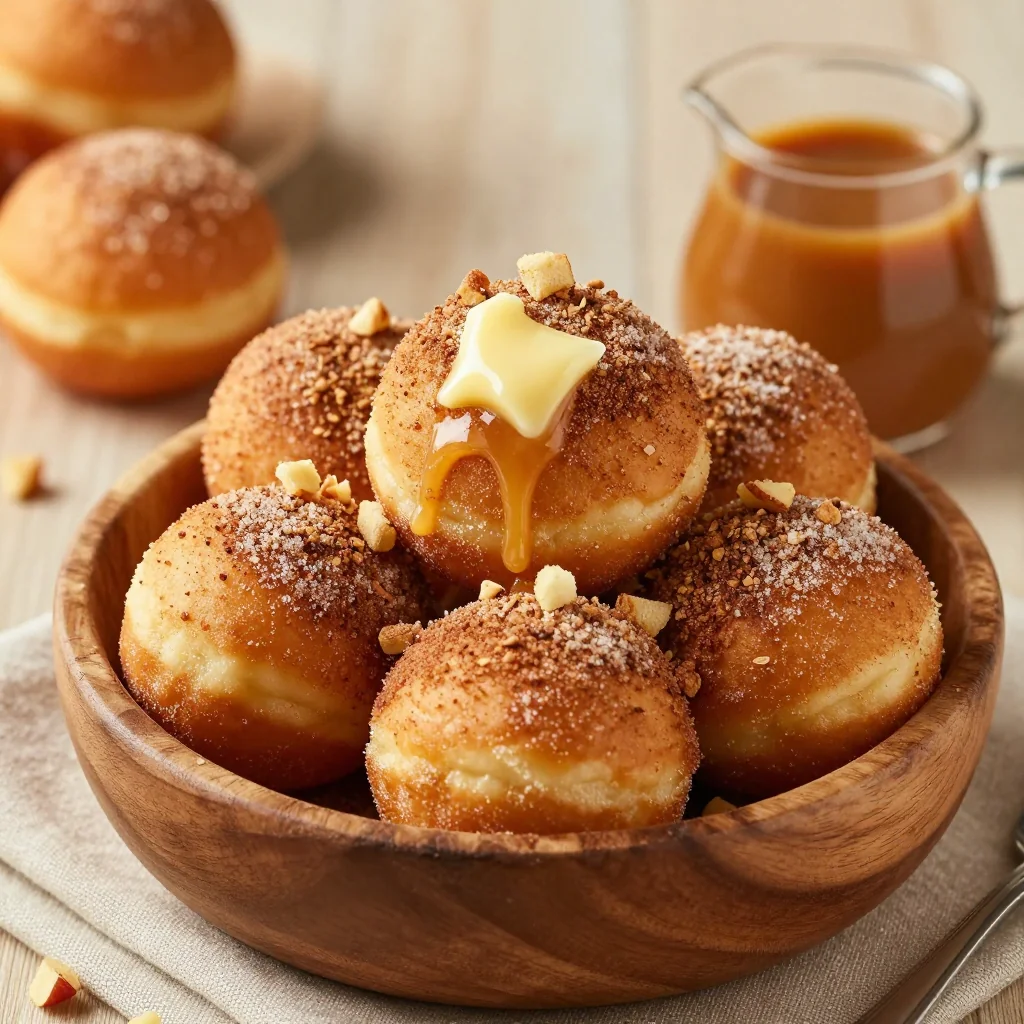
I still remember the day I ruined a perfectly good batch of caramel apples. The caramel was too sticky, the apples kept sliding off the sticks, and my kitchen looked like a sugar bomb had exploded. As I stood there, licking caramel off my elbow and wondering if I should just order takeout for dessert, it hit me — what if I could capture everything I loved about caramel apples without the mess, the sticks, or the jaw-breaking chew? That sticky disaster led to this crispy, crackly, utterly addictive Caramel Apple Bark that'll make you forget traditional caramel apples ever existed.
Picture this: thin shards of chocolate that snap like autumn leaves underfoot, revealing pockets of gooey caramel that stretch like edible silk threads, punctuated by tiny bursts of tart apple that wake up your taste buds like a crisp October breeze. The first time I made this, I set it out on a platter during game night, then pretended I needed something from the kitchen so I could hover near the serving plate and watch people's faces transform from polite curiosity to pure, unbridled joy. My friend Marcus actually did a little dance — and this is a man who claims he doesn't like dessert.
Here's the beautiful thing about this recipe: it takes everything frustrating about caramel apples and flips it on its head. No more worrying about whether your caramel will set properly or if your apples are too juicy. Instead, you get all those nostalgic flavors — the buttery richness of caramel, the bright snap of apple, the comfort of chocolate — in a format that's sophisticated enough for a dinner party but approachable enough for an after-school snack. Plus, it keeps for weeks in the fridge (though good luck having it last more than a few days).
Stay with me here — this is worth it. I'm about to show you how to make caramel apple bark that'll have people begging for the recipe, and the secret lies in one unexpected technique that transforms ordinary ingredients into something magical. Let me walk you through every single step — by the end, you'll wonder how you ever made it any other way.
What Makes This Version Stand Out
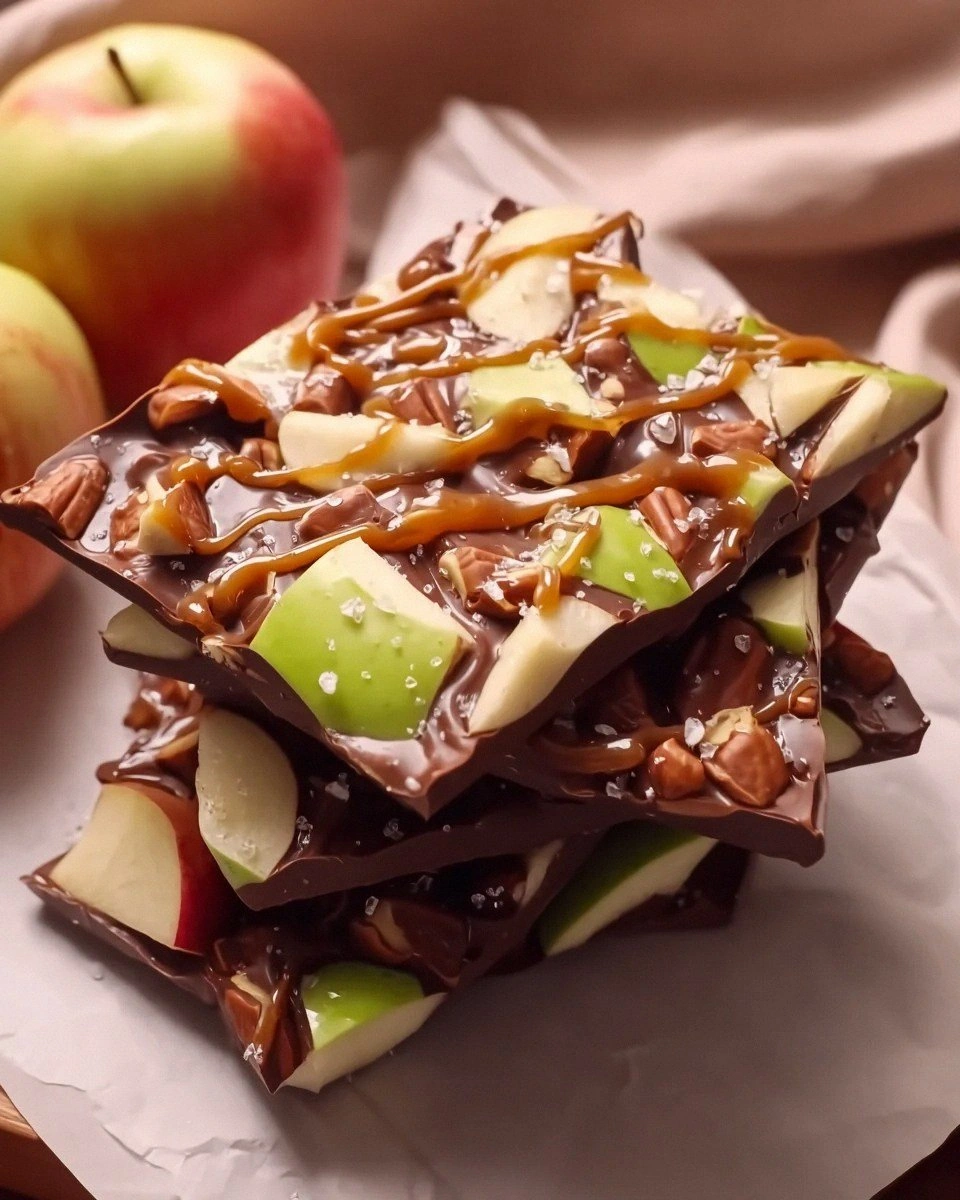
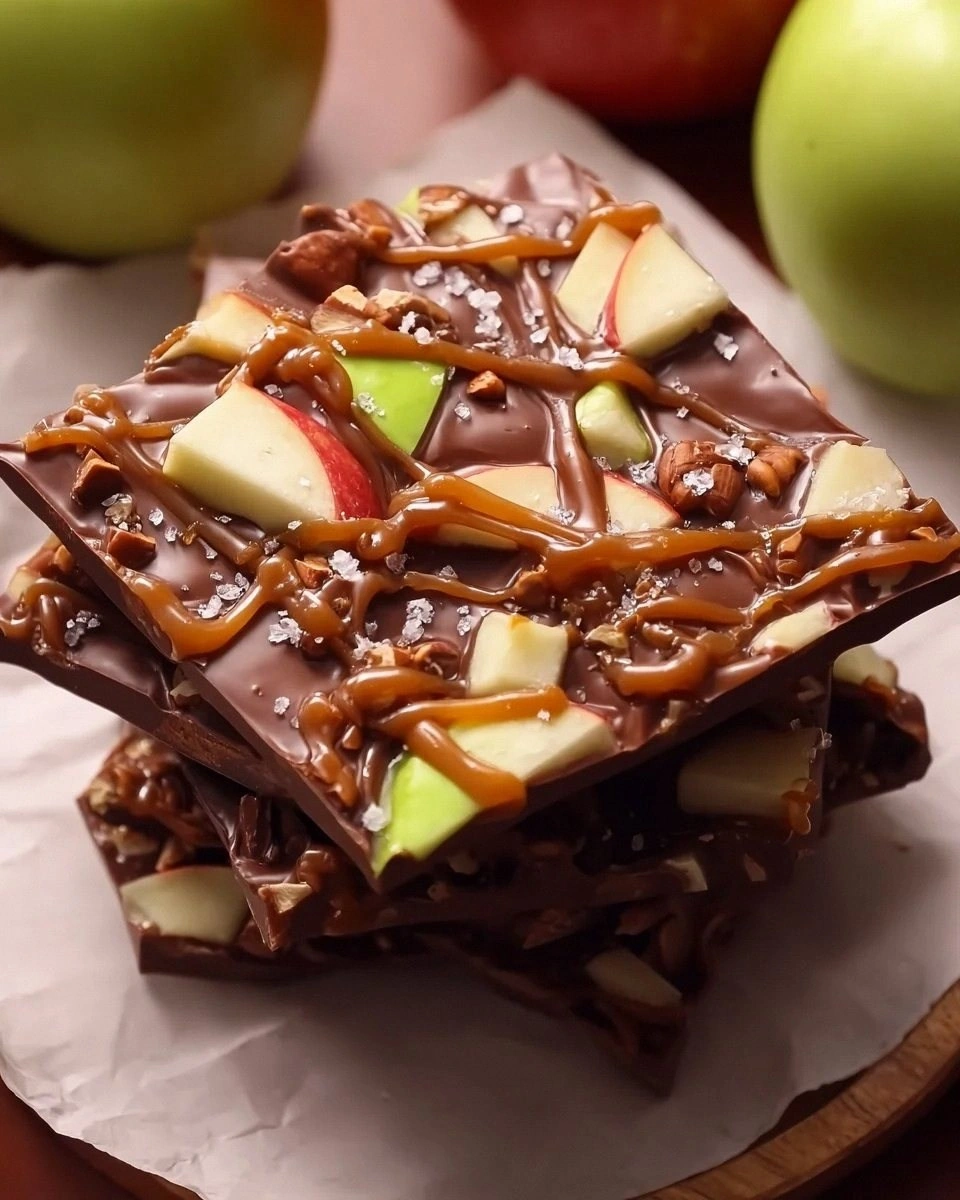
Restaurant-Quality Texture: This isn't your average chocolate bark with random toppings thrown on top. We're creating layers of texture that would make a pastry chef jealous — a chocolate base that's tempered for that perfect snap, caramel that's cooked to exactly 248 degrees Fahrenheit for the ideal chewy consistency, and apple pieces that are dehydrated just enough to concentrate their flavor without becoming leathery. The result is bark that shatters beautifully when you break it, revealing those gorgeous caramel ribbons inside.
Fall Flavor Explosion: Most caramel apple recipes taste like sugar with a hint of apple. Not this one. We're using three different apple products — dried apple pieces, apple cider reduction, and a whisper of apple pie spice — to create depth that'll make your taste buds do a happy dance. It's like autumn exploded in your mouth, but in the most sophisticated way possible.
Foolproof Technique: If you've ever tried making caramel and ended up with a grainy, crystallized mess, you're not alone — and I've got the fix. My method uses a touch of corn syrup and a pastry brush to prevent crystals, plus a visual cue system that means you'll never have to guess when your caramel is ready. No candy thermometer? No problem. I'll show you exactly what to look for.
Make-Ahead Magic: This bark actually improves after a day or two as the flavors meld together. I make huge batches in October and keep them in pretty tins for impromptu hostess gifts throughout the holiday season. It travels well, ships beautifully, and stays fresh for up to a month in the fridge — though I've never actually tested that limit because it always disappears first.
Customizable Canvas: Once you master the base recipe, you can switch it up endlessly. Add smoked salt for a sophisticated edge, sprinkle in some candied pecans for extra crunch, or drizzle with white chocolate for visual appeal. I've even made a version with bourbon-soaked apples for the adults-only cookie exchange party.
Conversation Starter: Bring this to any gathering and watch what happens. People can't resist breaking off pieces, then they taste it and their eyes go wide. "What is this?" they'll ask, and you'll become the most popular person in the room. My neighbor still talks about the batch I brought to the block party three years ago.
Alright, let's break down exactly what goes into this masterpiece...
Inside the Ingredient List
The Flavor Foundation
Dark chocolate forms the backbone of this bark, and please, for the love of all that's holy, don't use those waxy chocolate chips from the baking aisle. You want real dark chocolate with at least 60% cocoa content — I prefer 70% because it creates this incredible contrast with the sweet caramel. The chocolate needs to be chopped into small, even pieces so it melts uniformly. If you can find chocolate that's already in pistoles (those little coin-shaped pieces), grab it — they're designed for melting and will save you time.
Heavy cream makes the caramel luxuriously rich and prevents it from becoming too chewy. Don't even think about substituting milk or half-and-half here — the fat content is crucial for that perfect texture. I use cream with at least 36% butterfat, and I always warm it slightly before adding it to the sugar. Cold cream can cause your caramel to seize up faster than you can say "kitchen disaster."
Granulated sugar is obviously essential, but here's what most recipes get wrong — they don't account for the moisture content in different climates. If you live somewhere humid, you might need to cook your caramel a degree or two higher to compensate. I learned this the hard way after moving from Arizona to Seattle and wondering why my caramel suddenly refused to set properly.
The Apple Arsenal
Dried apple chips are your secret weapon here. Don't confuse these with the soft, leathery dried apples from the bulk bins — you want the crispy ones that come in a bag, usually near the trail mix. They add concentrated apple flavor and maintain their crunch even after being coated in caramel. I like to break them into different sizes so every bite has a different apple-to-caramel ratio.
Apple cider reduction sounds fancy but couldn't be simpler — just simmer fresh apple cider until it reduces by half. This concentrated apple essence gets stirred into the caramel for depth of flavor that'll make people wonder what your secret ingredient is. The reduction keeps in the fridge for weeks, so make extra and drizzle it over oatmeal or pancakes.
Apple pie spice might seem redundant when you already have apples, but trust me — that blend of cinnamon, nutmeg, and allspice ties everything together and makes the apple flavor pop. I make my own blend because store-bought versions are usually heavy on cinnamon and light on everything else, but use what you have.
The Unexpected Star
Sea salt flakes aren't just for garnish — they create these little pockets of salty surprise that make the sweet flavors sing. I use Maldon because the pyramid-shaped crystals dissolve slowly on your tongue, giving you waves of saltiness rather than one flat note. Sprinkle it on while the chocolate is still soft so it adheres properly.
Coconut oil might seem out of place, but just a teaspoon mixed into your chocolate helps it set with that professional-looking shine and snap. It's my secret for chocolate that looks like it came from an expensive chocolatier. Don't worry, you won't taste it — the apple and caramel flavors are much stronger.
The Final Flourish
Vanilla bean paste is worth every penny here. Those little black specks throughout the caramel aren't just pretty — they add complex floral notes that extract can't match. If you absolutely must substitute, use half the amount of extract since it's more concentrated. But really, treat yourself to the paste just once and you'll be converted.
Everything's prepped? Good. Let's get into the real action...
The Method — Step by Step
- Start by lining a baking sheet with parchment paper, but here's the trick — crinkle it up first, then smooth it out. This creates tiny air pockets that prevent the chocolate from sticking and gives your bark a more rustic, artisanal look. I've tried using wax paper and silicone mats, but parchment wins every time for easy release. Make sure the parchment overhangs the edges by a few inches so you can lift the whole slab out later. Place this sheet on a heatproof surface because you'll be pouring hot caramel onto it later.
- Chop your chocolate into small, even pieces, about the size of peas. This ensures everything melts at the same rate and you won't end up with stubborn chunks that refuse to cooperate. I use a serrated knife for this — it cuts through chocolate without causing it to shatter and fly across the kitchen. Place two-thirds of the chopped chocolate in a heatproof bowl set over barely simmering water. The water shouldn't touch the bowl — you want gentle heat, not a chocolate jacuzzi. Stir occasionally with a rubber spatula until it's about 80% melted, then remove from heat.
- Now comes the part that separates amateurs from pros — seeding the chocolate. Add the remaining third of your chopped chocolate to the melted chocolate and stir gently until everything is smooth and glossy. This technique, called tempering, gives your chocolate that satisfying snap and prevents the white streaks (bloom) that happen when chocolate sets improperly. The chocolate should feel comfortably warm, not hot, when you touch a drop to your lip. If it's too hot, let it cool for a few minutes before proceeding.
- Pour the chocolate onto your prepared parchment and spread it into an even layer, about 1/4 inch thick. I use an offset spatula, but the back of a spoon works fine — just work quickly before the chocolate starts to set. You want it thin enough to snap easily but thick enough to support the caramel and apple toppings. Don't stress about making it perfect — rustic edges actually look more appealing. Give the pan a gentle tap on the counter to release any air bubbles.
- While the chocolate sets, start your caramel. Combine sugar, corn syrup, and water in a heavy-bottomed saucepan — the heavy bottom prevents hot spots that can burn your caramel. Resist the urge to stir once it starts boiling — instead, gently swirl the pan to distribute the heat evenly. Keep a pastry brush dipped in water handy to wash down any sugar crystals from the sides. This prevents the whole batch from crystallizing into a grainy mess that'll make you want to cry.
- Watch closely as the sugar mixture turns from clear to pale gold to amber. This transformation happens faster than you think, and burnt sugar tastes bitter and awful. When you see wisps of smoke and smell a nutty aroma, it's time to add the cream. Remove from heat and slowly pour in the warm cream while whisking constantly. The mixture will bubble up dramatically — this is normal and totally Instagram-worthy. Keep whisking until smooth, then add butter and let it melt completely.
- Return the pan to medium heat and cook the caramel until it reaches 248 degrees Fahrenheit — the firm ball stage. If you don't have a thermometer, drop a small amount into ice water; it should form a firm but pliable ball that you can flatten. This takes about 5-7 minutes, and the caramel will darken slightly. Remove from heat and stir in the apple cider reduction, vanilla bean paste, and apple pie spice. Let it cool for 2 minutes — if it's too hot, it'll melt right through your chocolate layer.
- Drizzle the warm caramel over the partially set chocolate in random patterns — think Jackson Pollock, not connect-the-dots. You want some areas with thick ribbons of caramel and others with just a whisper. Work quickly but carefully — the caramel should spread slightly but not completely melt the chocolate underneath. If it seems too thick, warm it for 10 seconds in the microwave. Use about three-quarters of your caramel, saving the rest for another use (trust me, you'll thank me later).
- While the caramel is still warm, scatter the broken apple chips over the surface. Press them in gently so they adhere, but don't bury them completely — you want some texture on top. I like to cluster them in some areas and leave others bare for visual interest. The heat from the caramel will soften them slightly while maintaining their crunch. If you're adding any nuts or extra toppings, now's the time to sprinkle them on.
- Finish with a generous sprinkle of flaky sea salt — this is non-negotiable. The salt creates these incredible flavor bombs that make the sweet caramel and apple sing. Be judicious but thorough — you want salt in every bite, not just on a few pieces. Let the bark set at room temperature for about an hour, then transfer to the fridge for 30 minutes to fully set. When ready to serve, lift the whole slab out using the parchment overhang and break into rustic pieces.
That's it — you did it. But hold on, I've got a few more tricks that'll take this to another level...
Insider Tricks for Flawless Results
The Temperature Rule Nobody Follows
Here's the thing about working with chocolate and caramel — they're both temperature divas that demand attention. Your kitchen should be cool but not cold (around 68-70 degrees Fahrenheit) when you're making this bark. Too warm and your chocolate won't set properly; too cold and your caramel will harden before you can spread it. I once tried making this during a heat wave and ended up with a sticky mess that never quite set. Now I crank up the AC or wait for a cooler day — patience, my friend, is a virtue that pays delicious dividends.
Why Your Nose Knows Best
Professional chocolatiers rely on sight and smell more than thermometers, and you should too. When your caramel reaches the perfect temperature, it'll smell like toasted nuts and butterscotch, not just sweet sugar. Your chocolate should smell rich and complex, not waxy or overly sweet. I can tell when my chocolate is properly tempered by the way it smells — it develops this incredible depth that makes my mouth water instantly. Trust your senses; they've been honed over thousands of years of human evolution for exactly this purpose.
The 5-Minute Rest That Changes Everything
After you pour the chocolate onto the parchment, let it rest for exactly 5 minutes before adding the caramel. This brief pause allows the chocolate to begin setting but remain soft enough for the caramel to adhere. Skip this step and your caramel will sink right through to the parchment, creating a mess that'll make you question your life choices. I set a timer because I'm impatient and have been known to rush this part with disastrous results. Those five minutes feel like forever, but they're the difference between amateur and professional-looking bark.
The Secret Ingredient You're Missing
Most people don't realize that a tiny pinch of citric acid in the caramel makes all the difference. It brightens the apple flavor and cuts through the richness of the caramel and chocolate, creating a more balanced final product. You can find citric acid in the canning section of most grocery stores, or just use a few drops of lemon juice if you're in a pinch. This small addition is my secret weapon — people can never quite identify what makes my bark so addictive, but they know it's something special.
Storage Wisdom for Maximum Freshness
Here's where most people go wrong — they store their bark in an airtight container at room temperature and wonder why it goes soft after a few days. The secret is adding a small packet of food-safe silica gel to absorb excess moisture. You know those little packets that come in vitamin bottles? Save them — they're perfect for this. Your bark will stay crisp and snappy for weeks instead of days. Just make sure they're clearly labeled so nobody accidentally eats them.
Creative Twists and Variations
This recipe is a playground. Here are some of my favorite ways to switch things up:
Smoky Bacon Caramel Apple Bark
For the ultimate sweet-savory experience, sprinkle crispy bacon pieces over the caramel before it sets. The smokiness pairs beautifully with the apple and caramel, creating a flavor profile that'll make grown adults weep with joy. I like to use thick-cut applewood-smoked bacon, cooked until crispy but not burnt. The salt from the bacon eliminates the need for additional sea salt, but I still add a tiny bit for that flavor punch. This version disappears fastest at parties — something about that bacon makes people lose all sense of decorum.
Spiced Rum Apple Bark for Adults
Soak the apple chips in spiced rum for 30 minutes before using them, then pat them dry with paper towels. The rum adds warmth and complexity that transforms this from a family treat to an sophisticated dessert. I like to use a dark, spiced rum like Captain Morgan or Sailor Jerry — something with notes of vanilla and cinnamon that complement the apple pie spice. Don't overdo it on the soaking time or your bark will taste more like a cocktail than dessert. A half-hour is plenty for flavor without making the chips soggy.
White Chocolate Cranberry Apple Bark
Swap the dark chocolate for good quality white chocolate and add dried cranberries along with the apple chips. The tart cranberries and sweet white chocolate create this incredible flavor dance that tastes like autumn in New England. I like to use white chocolate with at least 30% cocoa butter — avoid the cheap stuff that lists palm oil as an ingredient. The caramel stays the same, but I reduce the apple pie spice by half so it doesn't compete with the more delicate white chocolate.
Salted Peanut Caramel Apple Bark
Add chopped salted peanuts and a swirl of peanut butter to the caramel for a flavor reminiscent of those caramel apple peanut treats from fall fairs. I warm a tablespoon of natural peanut butter and drizzle it over the caramel before adding the apple chips. The combination of peanut butter, caramel, and apple sounds strange but tastes like childhood memories. Use dry-roasted, salted peanuts for the best contrast — the salt is crucial for balancing all that sweetness.
Maple Bourbon Caramel Apple Bark
Replace half the sugar in the caramel with pure maple syrup and add a tablespoon of bourbon along with the cream. The maple adds a deeper, more complex sweetness than regular sugar, while the bourbon provides warmth and sophistication. This version tastes like a cozy evening by the fire in Vermont. I like to use Grade B maple syrup for its robust flavor, but any pure maple syrup will work. The caramel will be slightly softer due to the maple syrup, so cook it one degree higher to compensate.
Double Chocolate Espresso Bark
Add a teaspoon of instant espresso powder to the chocolate when melting and drizzle with milk chocolate after adding the caramel. The espresso enhances the chocolate flavor without making it taste like coffee, while the double chocolate approach satisfies even the most serious chocoholics. I use Dutch-processed cocoa powder for a deeper, more complex chocolate flavor. This version is dangerously addictive — I once ate an entire batch while binge-watching my favorite show without even realizing it.
Storing and Bringing It Back to Life
Fridge Storage
Store your bark in an airtight container in the refrigerator for up to 3 weeks, with each piece separated by parchment paper to prevent sticking. The cold temperature keeps the chocolate snappy and the caramel firm, but let it sit at room temperature for 10 minutes before serving for maximum flavor. I like to keep mine in a pretty tin with a tight-fitting lid — it makes a wonderful emergency dessert for unexpected guests. If your fridge tends to be humid, add a small packet of rice wrapped in cheesecloth to absorb moisture and keep your bark crisp.
Freezer Friendly
This bark freezes beautifully for up to 3 months if wrapped properly. First, freeze the pieces on a baking sheet for an hour, then transfer to a freezer-safe container with parchment between layers. Wrap the container in plastic wrap for extra protection against freezer burn. When you're ready to enjoy, thaw in the refrigerator overnight, then let it sit at room temperature for 15 minutes before serving. The texture might be slightly softer than fresh, but the flavor is just as incredible. I always keep a batch in the freezer during the holidays for last-minute entertaining.
Best Reheating Method
If your bark has been stored in the fridge and seems too hard, let it sit at room temperature for 10-15 minutes before serving. Never microwave it — the chocolate will seize and the caramel will become unpleasantly chewy. If your chocolate has bloomed (those white streaks), you can gently warm it in a 200-degree Fahrenheit oven for 5 minutes to help redistribute the cocoa butter, but honestly, it still tastes great even with bloom. The key is patience — let it come to temperature naturally for the best texture and flavor.