I still remember the day my beloved springform pan betrayed me. There I was, attempting to impress my future mother-in-law with what I thought would be a simple cheesecake, when the bottom literally fell out and my half-baked creation oozed across the oven floor like a sweet, sticky crime scene. Fast forward through three failed attempts, a minor kitchen fire, and what my husband calls "The Great Cheesecake Meltdown of 2019," I finally cracked the code. This strawberry lemon cheesecake isn't just another recipe—it's the result of obsessive testing, countless taste tests (poor me), and discovering the secrets that transform a potentially dense disaster into something so creamy, so perfectly balanced, that it literally makes people close their eyes and sigh when they take the first bite.
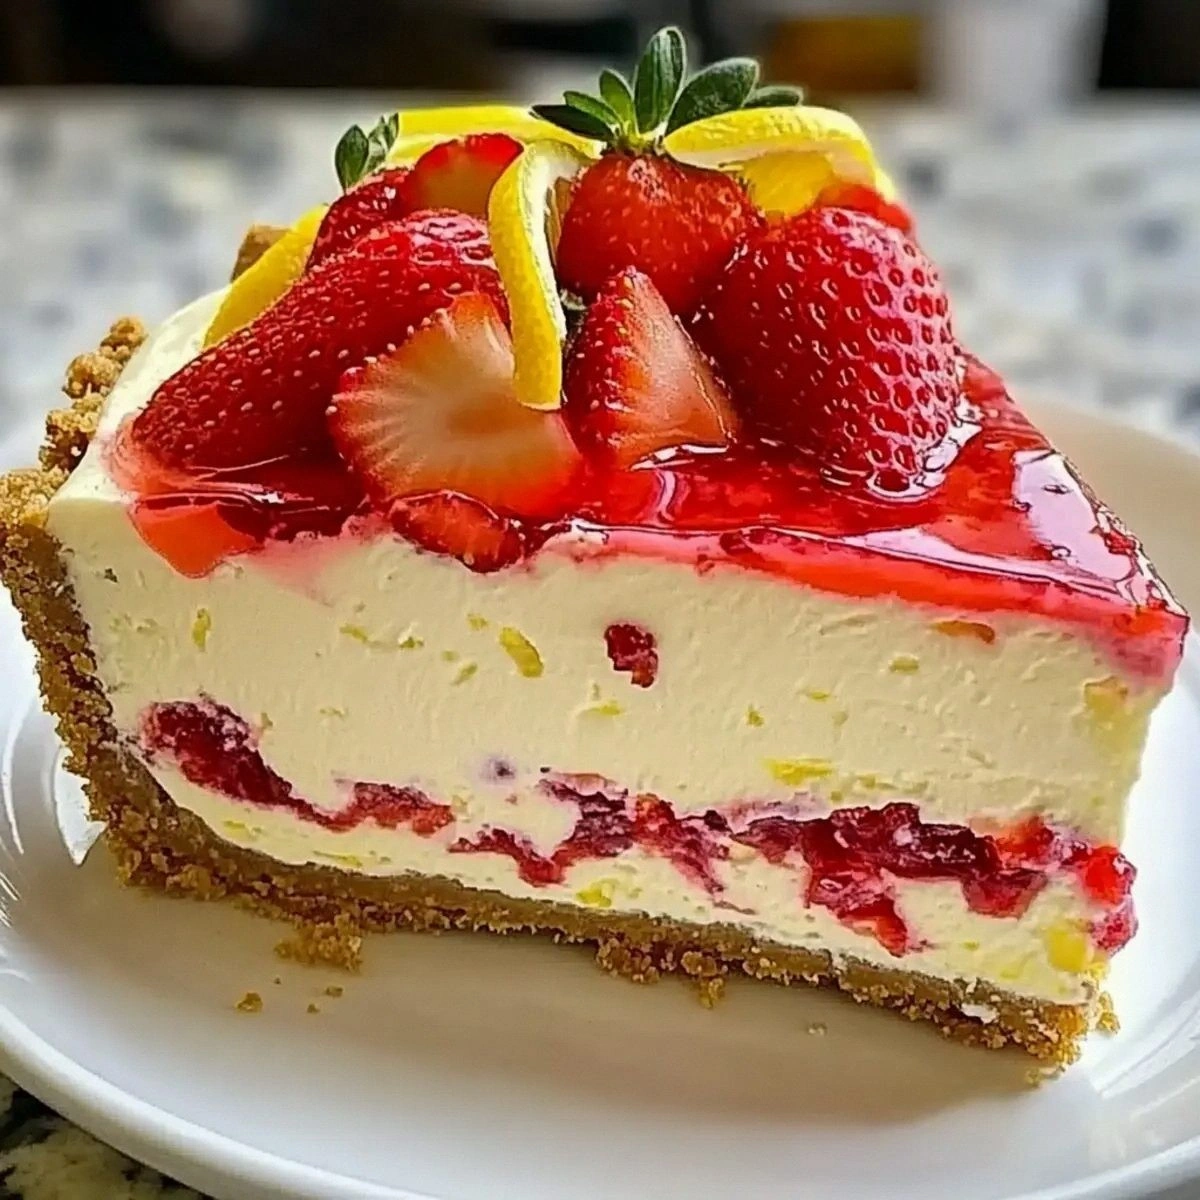
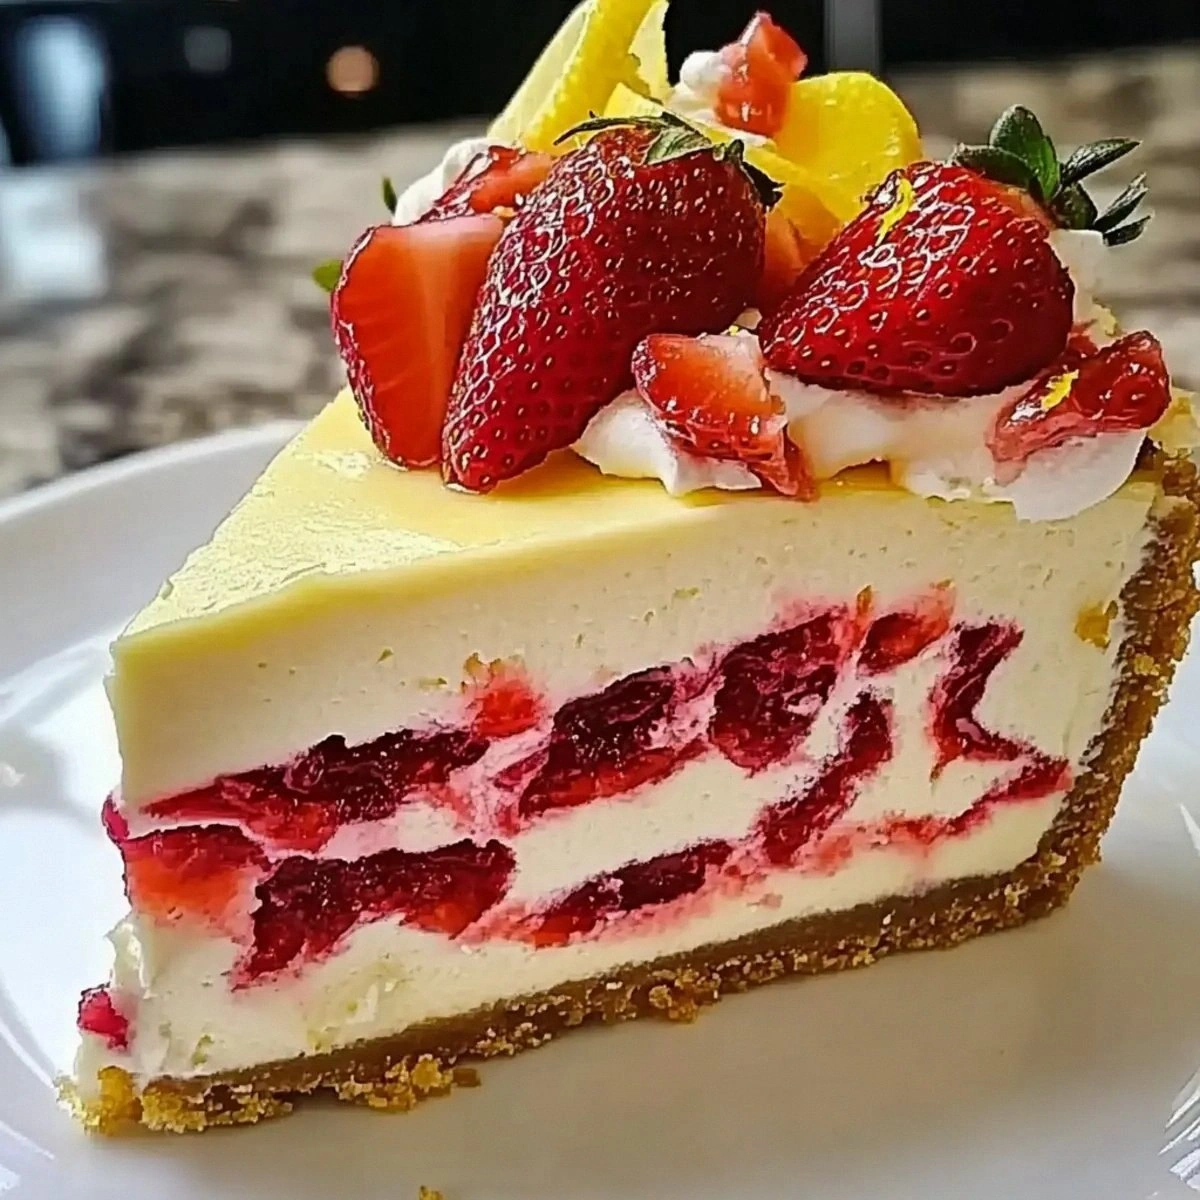
Picture this: it's Sunday afternoon, your kitchen windows are cracked open, and the scent of buttery graham cracker crust mingling with bright lemon zest is drifting through your home like edible aromatherapy. You're pulling this beauty from the oven, watching it jiggle just slightly in the center like it's doing a happy dance, knowing that in just a few hours you'll be serving up slices of pure sunshine. That first forkful? It's going to be a revelation. The tangy lemon cuts through the richness of the cream cheese like a beam of light, while ribbons of strawberry create these gorgeous marbled swirls that look like edible art. And here's the kicker—no water bath required, no cracked tops, no "hope and pray" moments where you're peeking through the oven window wondering if you're about to serve cheesecake soup.
Okay, ready for the game-changer? This recipe breaks every rule you've heard about cheesecake being fussy and temperamental. We're talking about a dessert that comes together faster than you can say "delivery pizza," yet tastes like you spent all day in pastry school. The secret lies in three simple techniques that most recipes completely ignore: starting with room temperature ingredients (yes, I know you've heard this before, but trust me, we're taking it to another level), the temperature dance that prevents cracks, and the shocking method that sets the texture without turning your cheesecake into a rubber Frisbee. By the time you finish reading this, you'll not only have the confidence to whip up this showstopper for your next dinner party, but you'll probably find yourself volunteering to bring dessert to every gathering because, honestly, this recipe makes you look like a culinary wizard.
Let me walk you through every single step—by the end, you'll wonder how you ever made it any other way. We're going to cover everything from selecting the creamiest cream cheese (yes, brands matter more than you think) to the exact moment when you should pull this beauty from the oven for that perfect jiggle. I'll share the storage tricks that keep it tasting fresh for days (though let's be real, it won't last that long), and the make-ahead secrets that let you serve restaurant-quality dessert with zero day-of stress. Grab your apron, crank up your favorite playlist, and let's create some kitchen magic together.
What Makes This Version Stand Out
Silky Texture: This isn't your typical dense, brick-like cheesecake that sits in your stomach like a paperweight. We're creating a texture so light and creamy, it practically melts on your tongue like ice cream on a warm summer day. The secret? Sour cream and the perfect egg-to-cream cheese ratio that creates air pockets so tiny, they create a texture that's both rich and cloud-like simultaneously.
Bold Flavor Balance: Most strawberry cheesecakes taste like someone dumped a jar of jam on top and called it a day. Not here. We're layering flavors like a symphony—bright lemon zest that makes your taste buds tango, strawberry preserves that provide concentrated fruit essence without watering down the filling, and just enough sugar to enhance without overwhelming. The result? Each bite tastes like springtime in pastry form.
Foolproof Method: Forget everything you've heard about cheesecakes being temperamental. This recipe uses a "low and slow" baking method that eliminates the need for a water bath while preventing the dreaded crack across the top. The edges set while the center stays creamy, creating that perfect contrast that makes people think you went to culinary school.
Make-Ahead Champion: Here's the beautiful truth—this cheesecake actually tastes better after a day in the fridge. The flavors meld and deepen, the texture sets to perfection, and you can slice it with restaurant-clean edges. Make it on Sunday, serve it on Friday, and everyone will think you have a secret pastry chef hiding in your pantry.
Pantry-Friendly Ingredients: No hunting for specialty items or spending a fortune on ingredients you'll use once. Everything in this recipe lives in any well-stocked kitchen, yet the result tastes like you imported ingredients from a French patisserie. Even the strawberry glaze uses basic cornstarch and fresh berries—no mysterious packets or hard-to-find thickeners.
Conversation Starter: I dare you to serve this without someone asking for the recipe. The marbled top creates visual drama, the first bite generates actual gasps, and the empty plate speaks louder than words. It's the kind of dessert that turns casual acquaintances into close friends and makes family members volunteer for dishwashing duty just to secure future invitations.
Beginner-Approved: If you can operate a mixer and read a thermometer, you can nail this recipe. No fancy techniques, no obscure equipment, no "fold until just combined but don't overmix but also don't undermix" nonsense. Just straightforward steps that build confidence and create a dessert that looks like it came from a professional bakery.
Inside the Ingredient List
The Flavor Foundation
Cream cheese is obviously the star here, but not all bricks are created equal. Skip the budget brands that contain stabilizers and gums—they create a grainy texture that no amount of mixing will fix. Go for full-fat Philadelphia or a high-quality store brand that's actually cream cheese, not "cream cheese product." The difference is immediately apparent when you taste the final result—real cream cheese creates a clean, tangy flavor that serves as the perfect canvas for our strawberry-lemon masterpiece. And here's what nobody tells you: if your cream cheese is too cold, it'll never fully incorporate with the sugar, leaving you with tiny white lumps that scream "amateur hour" to anyone who eats it.
The sour cream isn't just for show—it provides acidity that activates our leavening (those eggs) while creating a texture so smooth, you'll want to face-plant into the mixing bowl. Greek yogurt works in a pinch, but sour cream has a higher fat content that creates that restaurant-quality richness. Don't even think about using low-fat versions; we're creating dessert here, not diet food. The vanilla extract might seem like a background player, but it bridges the gap between the bright lemon and sweet strawberry, creating complexity that makes people ask "what's that amazing flavor I can't quite place?"
The Texture Crew
Those three large eggs aren't just binding agents—they're the architects of our texture. Room temperature eggs incorporate more air when beaten, creating lift that keeps our cheesecake from becoming a dairy doorstop. The yolks add richness and color, while the whites provide structure. This is why cold eggs are the enemy of smooth cheesecake—they don't emulsify properly with the fat, creating a curdled appearance that even the most beautiful strawberry glaze can't hide. Crack them into a small bowl first to check for shell fragments and to make sure they're fresh; cloudy whites indicate super-fresh eggs that'll give you the best texture.
Lemon zest provides the essential oils that lemon juice can't deliver—it's like the difference between fresh herbs and dried ones. The zest contains aromatic compounds that bloom during baking, creating bright, floral notes that make the strawberry taste more strawberry-y (yes, that's a technical term in my kitchen). Use a microplane and only remove the yellow part; the white pith underneath is bitter and will turn your cheesecake from sunshine to sadness. One tablespoon might seem like a lot, but trust me—most of the flavor compounds break down during baking, so we need to start bold.
The Sweet Science
Granulated sugar does more than sweeten—it controls the texture by interfering with protein bonding, keeping our cheesecake tender instead of rubbery. The amount isn't arbitrary; too little and you lose moisture retention, too much and you risk a filling that weeps liquid like it has allergies. We're using it in three strategic places: the crust for caramelization, the filling for sweetness and texture, and the glaze for shine and preservation. Each application serves a different purpose, creating layers of sweetness rather than a one-note sugar bomb.
Strawberry preserves concentrate fruit flavor without adding excess moisture that would make our filling soupy. Look for preserves over jam—preserves contain actual fruit pieces that create little pockets of intense strawberry flavor throughout the cheesecake. Seedless varieties create a smoother texture, but I actually prefer the occasional seed for authenticity. If you're feeling fancy, warm the preserves slightly and strain out the big pieces for a more refined texture, but honestly, the rustic look makes people think you slaved over fresh strawberries for hours.
The Unexpected Star
Cornstarch might seem like an odd addition to a cheesecake, but here's the magic: mixed with a splash of water and added to our strawberry glaze, it creates a glossy, professional finish that clings to berries like edible jewelry. This isn't your grandmother's cornstarch pudding—when used correctly, it provides body without that pasty texture that ruins so many fruit desserts. The key is creating a slurry first (mixing with cold water) before adding to hot liquid, preventing those dreaded lumps that look like tiny alien eggs floating in your beautiful glaze.
The heavy cream for our final whipped topping needs to be ice-cold—this isn't negotiable. Warm cream won't whip properly, and you'll end up with butter if you overbeat trying to get peaks. Keep it in the coldest part of your fridge until the last moment, and chill your mixing bowl and whisk if you're feeling extra (which you should be—this is cheesecake, not Tuesday night tacos). The powdered sugar stabilizes the cream, allowing you to pipe beautiful rosettes that hold their shape for hours, not minutes like plain whipped cream.
The Final Flourish
Fresh strawberries aren't just pretty—they provide acid that balances sweetness, vitamin C that prevents oxidation, and that gorgeous red color that makes Instagram lose its mind. Choose berries that smell like strawberries (revolutionary, I know) and have no white or green shoulders. Size doesn't matter here; we're slicing them anyway, so go for flavor over appearance. And here's a pro tip: toss them with a squeeze of lemon juice right before topping. It prevents browning and enhances that fresh-picked flavor that makes people think you have a secret strawberry patch.
Everything's prepped? Good. Let's get into the real action...
The Method — Step by Step
- Preheat your oven to 325°F (not 350°F like most recipes—this lower temperature is crucial for preventing cracks and ensuring even baking). While it's heating, wrap the outside of your 9-inch springform pan with two layers of heavy-duty aluminum foil, bringing it up the sides about 2 inches. This isn't for a water bath; it's insurance against any butter leakage from our crust. Place the wrapped pan on a baking sheet—trust me, you'll thank me later when you're not scraping burned sugar off your oven floor.
- Create the crust by combining graham cracker crumbs, melted butter, and sugar in a bowl until it resembles wet sand. The texture should hold together when squeezed but break apart easily—think beach sand castle consistency. Press this mixture firmly into the bottom of your pan using the bottom of a measuring cup, creating an even layer that extends about 1/2 inch up the sides. This creates a barrier that prevents the filling from seeping under the crust. Bake for 8 minutes until it smells like cookies and the edges are just starting to turn golden. That toasty aroma? That's flavor development happening.
- While the crust cools slightly, beat the cream cheese on medium speed for exactly 2 minutes. Set a timer—overbeating incorporates too much air that will cause your cheesecake to puff up like a balloon then collapse into a crater. The mixture should look smooth and fluffy, like clouds made of dairy. Scrape down the bowl twice during mixing; those cream cheese clumps hiding at the bottom are texture saboteurs waiting to ruin your smooth filling.
- Add the sugar gradually, letting it incorporate fully between additions. This isn't just busy work—gradual sugar addition prevents grittiness and helps dissolve crystals that would create a sandy texture. The mixture will lighten in color and increase in volume slightly. When you rub a small amount between your fingers, it should feel completely smooth with zero sugar granules. This step takes about 3 minutes total, but it's the difference between professional and "pretty good for homemade."
- Beat in the sour cream and vanilla until just combined, then add lemon zest. Here's where most recipes go wrong—they tell you to add zest with the wet ingredients, but adding it now distributes it evenly without clumping. The oils in the zest need fat to bloom properly, and the sour cream provides the perfect medium. The mixture should smell like a lemon grove in springtime, bright and floral without being sharp or bitter.
- Add eggs one at a time, beating on low speed just until the yellow disappears. Overbeating eggs develops proteins that create a rubbery texture—think scrambled eggs instead of custard. Each egg should disappear into the mixture within 15-20 seconds. Stop the mixer and scrape down the bowl after each addition; this ensures even distribution and prevents streaks of unmixed cream cheese in your final product.
- Warm the strawberry preserves in the microwave for 10-15 seconds until they're slightly runny. This makes them easier to marble and prevents them from sinking to the bottom of your cheesecake. Drop spoonfuls randomly over your cream cheese filling, then use a butter knife to create figure-eight motions through the batter. Don't overmix—you want distinct ribbons of strawberry, not pink cheesecake. Think lava lamp, not strawberry milk.
- Pour the filling over your pre-baked crust, gently spreading to the edges. Tap the pan firmly on the counter 5-6 times to release any trapped air bubbles—these will rise to the surface and create unsightly craters in your finished cheesecake. The batter should settle into a smooth, even layer that jiggles like set gelatin when you shake the pan. If you see large bubbles rising, tap a few more times or pop them with a toothpick.
- Bake for 45-50 minutes, rotating the pan halfway through for even browning. The edges should be set but the center should still jiggle like gelatin when you gently shake the pan. It will look underdone—this is perfect. The residual heat will finish cooking the center as it cools, creating that creamy texture that makes people close their eyes in bliss. If the top starts browning too quickly, tent loosely with foil for the last 15 minutes.
- Turn off the oven and crack the door open with a wooden spoon. Let the cheesecake cool inside for 1 hour—this gradual cooling prevents the dramatic temperature drop that causes cracks. The slow cooling allows the proteins to set gently, creating that smooth, creamy texture that makes people think you spent hours perfecting your technique. During this time, it will deflate slightly in the center—this is normal and creates the perfect well for your strawberry topping.
- Remove from the oven and run a thin knife around the edge to release any stuck bits. This prevents cracks as the cheesecake contracts during cooling. Don't remove the springform ring yet—let it cool completely at room temperature for another hour. The cheesecake will continue to firm up as it cools, transforming from wobbly custard to sliceable perfection. Refrigerate for at least 4 hours or overnight for the best texture and cleanest slices.
- While the cheesecake chills, create the strawberry glaze. Combine fresh sliced strawberries, sugar, and lemon juice in a saucepan over medium heat. The sugar will draw out the berry juices, creating a natural syrup. Cook for 5-7 minutes until the berries soften but still hold their shape. Mix cornstarch with cold water until smooth, then stir into the berry mixture. Cook for another 2-3 minutes until the glaze thickens and becomes glossy, coating the berries like liquid rubies. Cool completely before topping your cheesecake.
- For the whipped cream, beat heavy cream, powdered sugar, and vanilla in a chilled bowl until soft peaks form. This takes about 2-3 minutes on medium-high speed. The peaks should curl over when you lift the beaters—stiff peaks will be too dense and butter-like. The powdered sugar stabilizes the cream, allowing you to pipe beautiful rosettes that hold their shape for hours. This isn't just garnish; it's the cloud-like finish that balances the richness of the cheesecake.
That's it—you did it. But hold on, I've got a few more tricks that'll take this to another level...
Insider Tricks for Flawless Results
The Temperature Rule Nobody Follows
Here's the truth that separates cheesecake masters from the rest: temperature matters at every single stage, not just for the ingredients. Your cream cheese mixture should never get warmer than 68°F during mixing—any hotter and you risk a grainy texture that no amount of chilling will fix. I keep a kitchen thermometer handy and check the bowl temperature periodically. If it starts warming up, I pop the whole bowl in the freezer for 5 minutes to cool down. This might seem obsessive, but it's the difference between a texture that makes people moan with pleasure and one that makes them politely chew while mentally noting never to ask you to bring dessert again.
After baking, the cooling process is equally crucial. I made this mistake once—pulled the cheesecake out, let it cool on the counter for 30 minutes, then stuck it straight in the fridge. The result? A cracked top that looked like the Sahara desert, and a texture that was dense and heavy instead of light and creamy. Now I treat my cheesecake like a delicate flower: oven cooling for an hour, room temperature cooling for another hour, then into the fridge for at least 4 hours. Yes, it requires patience, but good things come to those who wait (and follow instructions).
Why Your Nose Knows Best
I'll be honest—I don't use timers for doneness anymore. After making this recipe dozens of times, I've learned that my nose is more reliable than any kitchen gadget. When the cheesecake is perfectly baked, your kitchen will smell like toasted vanilla and buttery crust with just a hint of lemon brightness. If you smell something sharp or eggy, it's either underbaked or overbaked. The aroma should be warm and inviting, like walking into a French patisserie. This might sound like kitchen voodoo, but our sense of smell is incredibly sophisticated at detecting when dairy proteins are perfectly cooked versus when they're starting to break down.
The visual cues are equally telling. A perfectly baked cheesecake will have edges that are slightly puffed and just starting to turn golden, while the center should still have a gentle jiggle—think Jell-O that's set but not firm. If the entire surface is puffed and firm, you've overbaked it. If only the very edges are set with a large wobbly center, give it another 5-10 minutes. And here's the thing—every oven is different, so learn to trust your senses over rigid timing.
The 5-Minute Rest That Changes Everything
Before serving, let your sliced cheesecake sit at room temperature for exactly 5 minutes. This isn't just being fancy—it allows the fats to soften slightly, releasing flavors that are muted when cold. Cold dulls sweetness and mutes aromatics, which is why ice cream tastes sweeter as it melts. Those five minutes transform each bite from "delicious" to "oh my god, what is this sorcery?" The texture becomes silkier, the flavors more pronounced, and the overall experience more memorable. My husband, who claims not to have a sweet tooth, actually closes his eyes when he eats this cheesecake after the five-minute rest—it's that dramatic of a difference.
During this rest, the condensation that forms on the plate as cold cheesecake meets warm air dissipates, preventing that unappetizing puddle that can make your beautiful dessert look like it's sweating. The slight warming also makes the strawberry glaze more aromatic and the whipped cream softer and more cloud-like. It's these tiny details that separate good home bakers from dessert legends.
Creative Twists and Variations
This recipe is a playground. Here are some of my favorite ways to switch things up:
Raspberry Lemonade Cheesecake
Swap the strawberry preserves for seedless raspberry jam and add an extra teaspoon of lemon zest. The raspberry provides a more intense tartness that makes the lemon pop even brighter. Top with fresh raspberries instead of strawberries—they hold their shape better and create these gorgeous little jewel-like mounds on each slice. The raspberry-lemon combination tastes like summer in the Hamptons, even if you're serving it in December.
Mixed Berry Mosaic
Use a mix of strawberry, raspberry, and blueberry preserves, dropping small spoonfuls randomly over the filling to create a mosaic effect. Each bite delivers a different berry experience—some bites are predominantly strawberry, others raspberry, creating a berry roulette that's fun and delicious. The different colors create a stunning marbled effect that looks like abstract art. Kids love this version because it's like getting multiple desserts in one slice.
Tropical Sunset Cheesecake
Replace the lemon zest with lime zest and use mango preserves instead of strawberry. Top with fresh mango slices and toasted coconut for a tropical vacation vibe. The lime provides the same brightness as lemon but with a more exotic flavor profile. A rum-based glaze instead of the strawberry version takes this straight to Key West, minus the airfare and sunburn.
Chocolate Strawberry Dream
Add 2 tablespoons of cocoa powder to the crust mixture for a chocolate graham cracker base. Swirl in chocolate syrup along with the strawberry preserves for a chocolate-covered strawberry effect. The chocolate adds depth and sophistication, making this taste like a gourmet chocolate-covered strawberry in cheesecake form. Dark chocolate shavings on top provide textural contrast and visual drama.
Lavender Honey Cheesecake
Add 1 teaspoon of culinary lavender to the cream cheese mixture and replace 1/4 cup of sugar with honey. The floral notes pair beautifully with lemon, creating a sophisticated flavor profile that tastes like a Provencal garden party. Top with candied lemon slices and a drizzle of honey for a dessert that looks like it belongs in a Parisian patisserie. This version converts even lavender skeptics—the key is using just enough to intrigue, not overwhelm.
Salted Caramel Apple Cheesecake
Swap the strawberry preserves for apple butter and add 1/2 teaspoon of cinnamon to the filling. Top with thin apple slices sautéed in butter and brown sugar, then drizzle with homemade salted caramel. The apple-caramel combination creates autumn on a fork, perfect for when strawberries are out of season. A sprinkle of flaky sea salt on top enhances all the sweet flavors and adds sophisticated contrast.
Storing and Bringing It Back to Life
Fridge Storage
Wrapped properly in plastic wrap (directly on the surface to prevent condensation) and stored in an airtight container, this cheesecake stays fresh for up to 5 days in the refrigerator. After day 3, the texture becomes slightly denser but the flavor actually deepens and improves. Cut slices with a hot, wet knife for clean edges—dip the knife in hot water, wipe dry, then cut. The heat melts through the filling cleanly instead of dragging and creating those sad, ragged edges that make your beautiful dessert look like it was attacked by a toddler.
Here's a pro move: if you're storing individual slices, place a piece of parchment paper between slices to prevent them from sticking together. This allows you to grab single servings without defrosting the entire cheesecake. The strawberry glaze will keep for 3 days before it starts to lose its glossy shine, but it still tastes delicious even when slightly dull. Store the whipped cream separately—piped rosettes will collapse in the fridge, but a dollop of fresh cream revives the dessert instantly.
Freezer Friendly
This cheesecake freezes beautifully for up to 2 months, making it perfect for entertaining emergencies. Freeze individual slices on a baking sheet until solid, then wrap each slice in plastic wrap followed by foil. This prevents freezer burn and allows you to thaw exactly what you need. The texture becomes slightly more dense after freezing, but the flavor remains exceptional. Thaw overnight in the refrigerator for best results—resist the microwave temptation unless you enjoy rubbery cheesecake soup.
For the best frozen texture, freeze the cheesecake without the strawberry glaze and whipped cream. Make these fresh when serving for maximum impact and texture. The frozen cheesecake slices actually make elegant ice cream sandwiches—serve them slightly thawed with a scoop of vanilla ice cream between two slices for a dessert that disappears faster than you can say "cheesecake." If you do freeze with the glaze, expect some weeping when thawed—just spoon off any excess liquid and refresh with fresh berries.
Best Reheating Method
Cheesecake shouldn't be served ice-cold straight from the fridge—it dulls flavors and creates a texture that fights back against your fork. Remove from the refrigerator 30 minutes before serving for optimal flavor and texture. If you're in a hurry, a 10-second microwave burst on 30% power will take the chill off without creating hot spots. The goal is "cool room temperature," not warm—warm cheesecake becomes unpleasantly soft and can separate into an oily mess.
For leftover slices that have been refrigerated, let them sit at room temperature for 15 minutes to take the fridge chill off. If the crust has become soggy from condensation, pop the slice in a 300°F oven for 5 minutes to re-crisp the base. This trick works miracles for restoring that satisfying crunch that makes the perfect textural contrast to the creamy filling. Just watch it closely—5 minutes too long and you'll have a crust that could chip teeth.