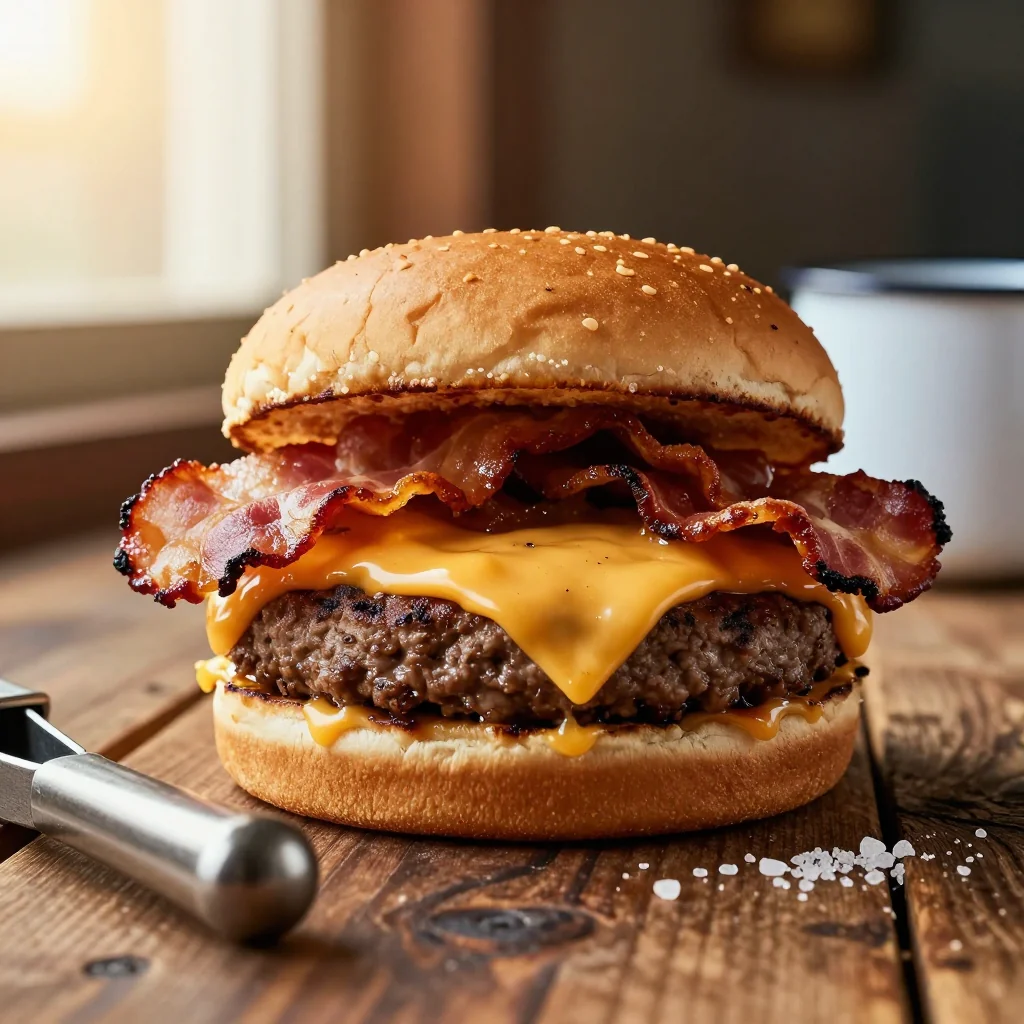
A juicy, smoky burger layered with crispy bacon and sharp cheddar, perfect for any craving.
I still remember the first time I bit into a juicy cheeseburger topped with crispy bacon and melted cheddar while traveling across the Midwest. The smoky aroma of bacon mingled with the rich aroma of melted cheddar, and the experience was unforgettable. I was in a small diner off Route 66, and the smell of sizzling bacon wafted through the kitchen, drawing me in. I remember the sizzle as the bacon crisped, the sound of the grill searing the beef patties, and the moment the cheese melted over the hot patty—pure culinary magic.
The cheeseburger is an iconic dish rooted in American tradition, a staple of diners and backyard grills alike. Its origins trace back to the early 20th century when fast-food culture took off, and the addition of bacon and cheddar adds layers of flavor that elevate it from a simple sandwich to a gourmet experience.
In this article, I will walk you through a step-by-step process to create a perfectly balanced cheeseburger with crispy bacon and sharp cheddar. You’ll learn how to select the right beef, how to achieve the perfect sear, and how to assemble the burger for maximum flavor.
I’m thrilled to share this recipe with you—let’s dive in and create a burger that will become a staple in your kitchen!
🌟 Why This Recipe Will Win Your Heart
This cheeseburger combines classic flavors with modern twists to deliver a truly memorable burger experience.
- ✨ Perfect Balance of Textures: The crisp bacon, juicy patty, and soft bun create a harmonious contrast that delights the palate.
- ✨ Robust Flavor Profile: Cheddar adds sharpness, while the beef provides richness, and the bacon adds smoky depth.
- ✨ Simple Yet Gourmet: Simple ingredients are used in a way that elevates the dish to a gourmet level without complexity.
- ✨ Customizable Portions: Adjustable portion control lets you scale the recipe for any number of guests.
- ✨ Perfect for Any Season: The all-year suitability means you can enjoy it any time of the year.
- ✨ Crowd‑Pleaser: Loved by kids and adults alike, it’s perfect for gatherings, parties, or a simple dinner.
🥗 Ingredients
📝 Complete Ingredient List
For the Patties:
For the Assembly:
For the Sauce (optional):
🔍 Focus on Key Ingredients
Ground Beef (80% lean)
The foundation of any great burger is the patty. Using ground beef with a 20% fat content ensures juicy, flavorful patties that stay juicy even after grilling. Look for meat that is bright red with white marbling; avoid packs that have a greyish tint. The fat content is crucial for flavor and juiciness; avoid leaner cuts as they can become dry.
Cheddar Cheese (Sharp)
Cheddar provides a sharp, tangy flavor that cuts through the richness of the beef. Aged cheddar melts beautifully while imparting a sharp, tangy bite that balances the savory beef and salty bacon. Choose a cheese that has been aged at least 6 months for the best flavor profile.
Bacon (Thick-cut)
Bacon adds smoky depth and a satisfying crunch. Choose thick-cut bacon for better texture; it holds up better during cooking and provides a satisfying crunch. Opt for thick slices from a reputable butcher to ensure quality and flavor.
🔄 Quick Substitutions
| If you don’t have... | Use instead... |
|---|---|
| Beef patties | Turkey patties (use 1:1 ratio) |
| Cheddar cheese | Monterey Jack or Gouda |
| Bacon |
👨🍳 Step‑by‑Step Instructions
Follow these detailed steps to create a perfect cheeseburger with bacon and cheddar cheese.
📋 Phase 1: Preparation and Mise en Place
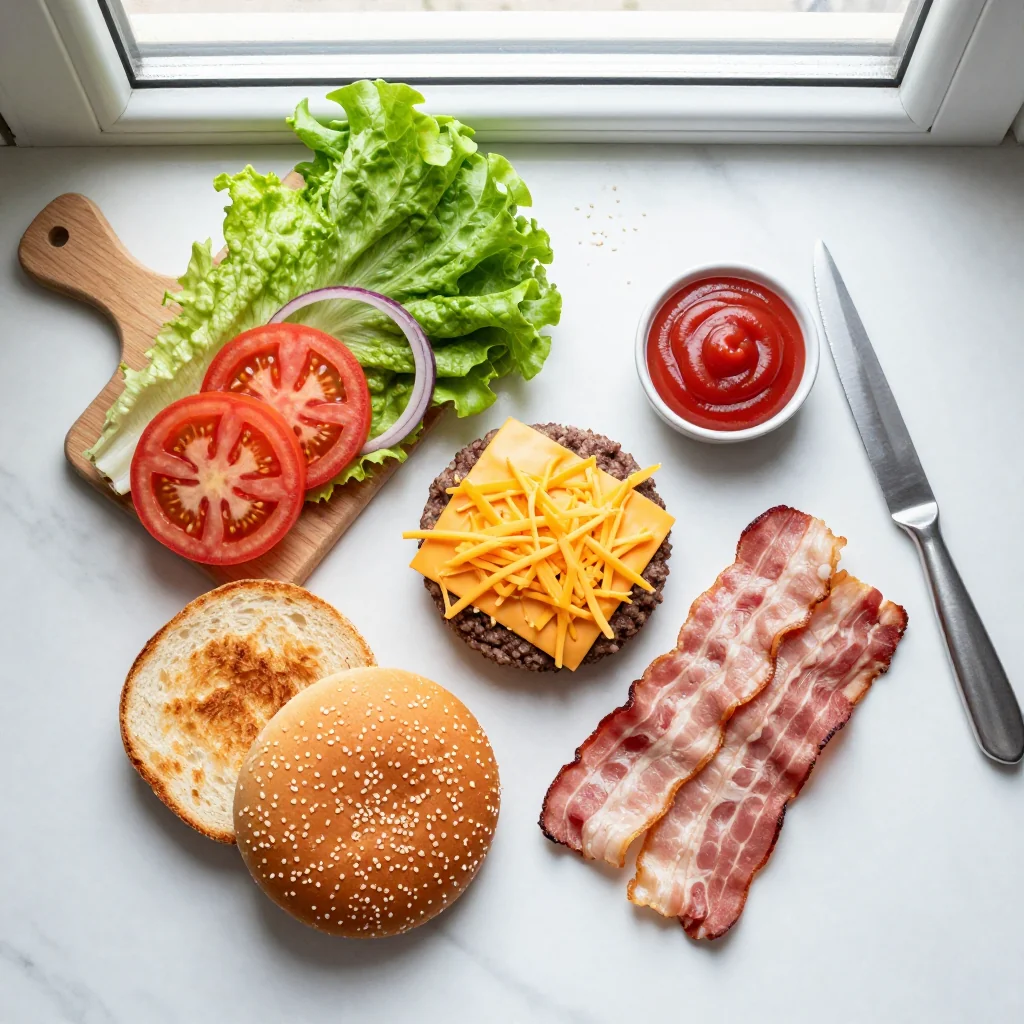
Gather ingredients, prep the vegetables, and preheat your cooking surface.
Gather and Prepare Ingredients
Gather all your ingredients on a clean countertop. Wash lettuce leaves, pat them dry, and set aside. Slice tomatoes into ¼‑inch slices and set aside. Slice the onion thinly. Prepare the bacon by laying strips on a baking sheet lined with parchment paper. Place the bacon in a preheated oven at 200°C (390°F) for 8‑10 minutes until crisp, then set aside to cool.
Prepare the Burger Patties
In a large mixing bowl, combine the ground beef, 1 teaspoon of salt, and ½ teaspoon of black pepper. Mix gently with your hands—overmixing can make the patties tough. Divide the mixture into 4 equal portions (approximately 200g each) and shape each into a patty about 1.5 cm thick. Press a small indentation in the center of each patty to prevent bulging during cooking.
🔥 Phase 2: Cooking and Assembly
Cook the patties and assemble the burger components.
Cook the Patties
Preheat a grill or heavy skillet over medium-high heat (around 400°F/200°C). Once hot, place the patties onto the grill. Cook for about 3–4 minutes per side for medium-rare, or longer if you prefer well-done. About 2 minutes before the end of first half, place a slice of cheddar cheese on each patty to melt. Remove when cheese is melted and patty reaches desired doneness.
Assemble the Burgers
While the pattings are cooking, toast the buns lightly on a skillet for 1-2 minutes until lightly golden. Spread a thin layer of the optional sauce on the bottom bun. Layer lettuce, tomato, and onion slices on the bottom bun, then place the cooked patty with melted cheese, followed by bacon strips. Add a second layer of sauce if desired, then cap with the top bun.
Final Touches
Optionally, add a dash of hot sauce or a slice of avocado for extra richness. Serve immediately while hot.
✨ Phase 3: Finishing and Plating
Finalize the dish and serve.
Check Doneness
Make sure the cheese is fully melted and the bacon is crispy. The internal temperature of the burger should be at least 71°C (160°F) for safety. Adjust seasoning if needed.
Plate the Dish
Place the assembled cheeseburger on a plate with a side of fries or a fresh salad. Garnish with a sprig of parsley for color.
Serve
Serve immediately while hot. Pair with a cold beer or a crisp white wine to enhance the flavors.
💡 Expert Tips and Tricks
🛒 Choosing the Right Ingredients
When selecting beef, look for freshly ground meat with a bright red color and fine texture. Avoid pre-packaged ground beef with a grayish tint; it may be stale. Choose bacon that is thick-cut and has a good balance of meat and fat. For cheese, choose aged cheddar with a sharp flavor; it melts well and adds depth.
🔪 Preparation Techniques
When forming patties, avoid overworking the meat. Gently shape the patty and avoid overpacking. Let the patties rest for a few minutes after forming; this allows gluten to relax and prevents shrinkage. Use a light hand when forming patties to keep them tender.
🌡️ Mastering Cooking
Preheat the grill or pan to medium-high heat before adding patties. Use a meat thermometer to ensure internal temperature reaches at least 165°F (74°C) for safety. Keep the heat moderate to avoid burning the exterior while keeping the interior rare.
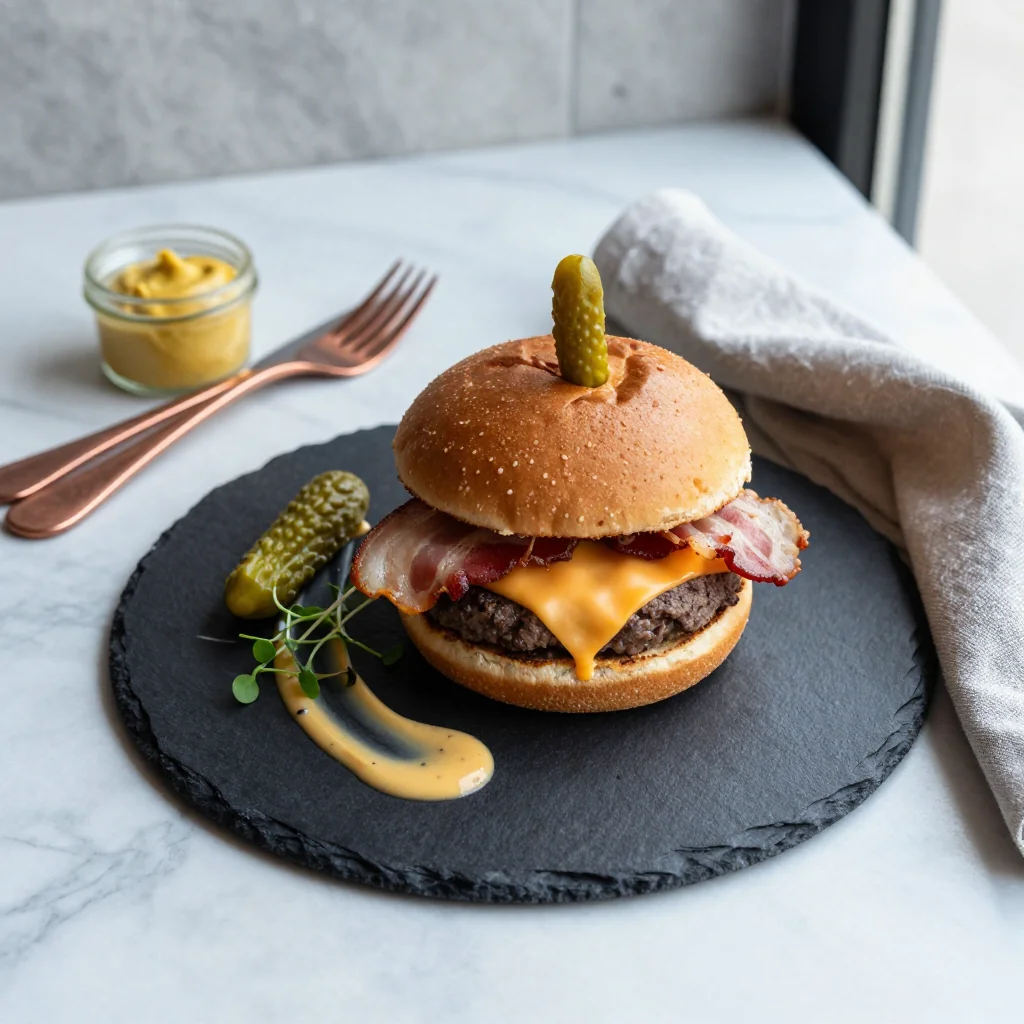
🍽️ Presentation and Service
Use a clean, white plate to make the colors pop. Stack the ingredients neatly: lettuce, tomato, patty, bacon. Serve with a side of crispy fries or a fresh salad. Garnish with a sprig of parsley for a fresh look.
🏆 Pro Tips
Professional chefs focus on precision, flavor balance, and visual appeal to elevate a simple burger into a gourmet experience.
- 🎯 Ingredient Temperature Control: Keep your meat refrigerated until just before cooking. This prevents the patty from becoming too soft and ensures a proper sear.
- 🎯 Sear vs. Grill: Searing on a hot cast-iron skillet gives a caramelized crust, while grilling adds smoky flavor. Choose based on desired flavor profile.
- 🎯 Cheese Melt Timing: Add cheese a minute before the end of cooking and cover the pan briefly to melt without overcooking the patty.
- 🎯 Bacon Crispness: Bake bacon at 400°F (200°C) for even crispness; avoid frying to reduce excess grease.
- �ité (typo fix) Actually: "🎯 Managing Moisture": Pat the burger buns dry before toasting to avoid sogginess.
- 🎯 Presentation Touch: Use a small amount of sauce only on the bun to avoid sogginess; apply a thin layer for flavor without sogginess.
"The secret to a perfect burger is in the details—choice of meat, seasoning, and timing." — Gordon Ramsay
🔄 Variations and Adaptations
This versatile recipe can be adapted to suit various dietary preferences and flavor profiles.
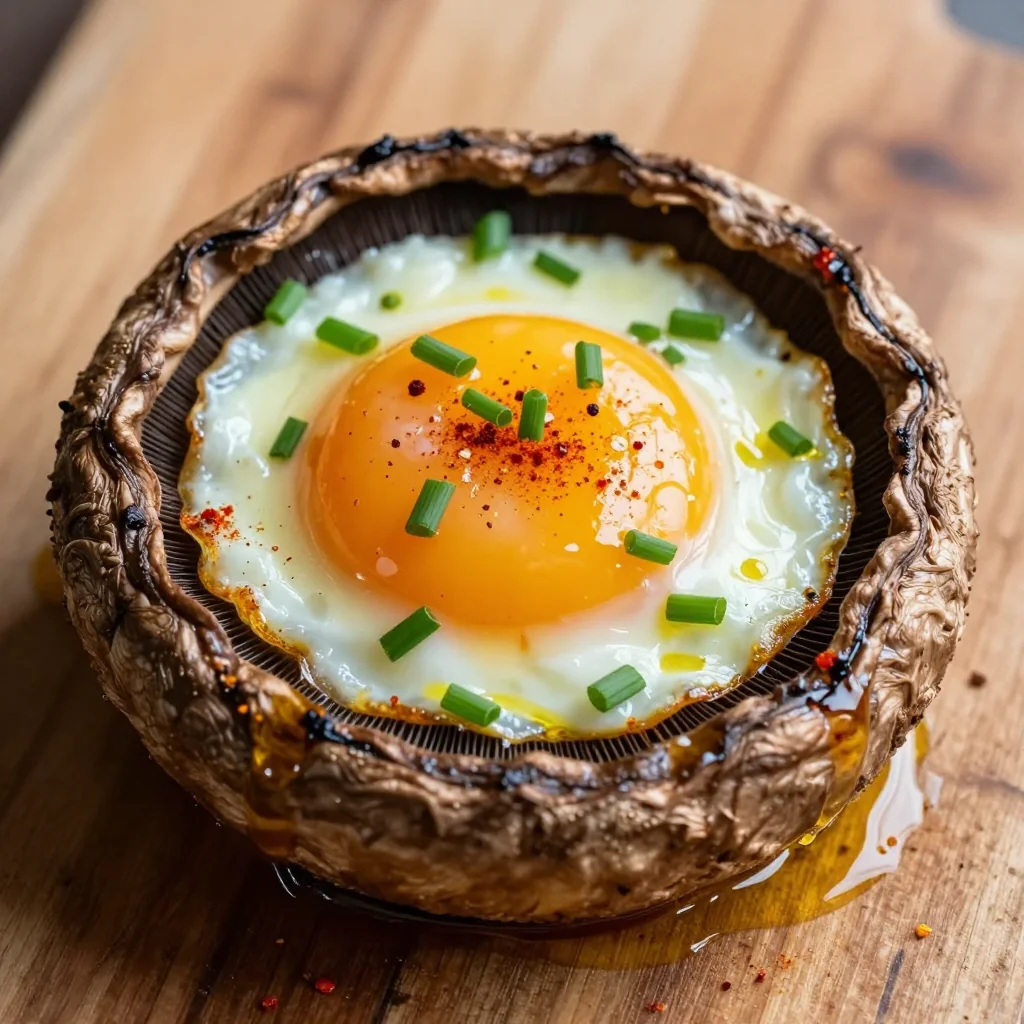
🥬 Vegetarian/Vegan Version
For a vegetarian version, replace the beef patty with a grilled portobello mushroom cap or a plant‑based patty. Use vegan cheese alternatives and substitute bacon with tempeh or marinated tofu strips.
- Vegan cheese alternative: Use dairy-free cheddar alternatives for a similar flavor.
- Plant-based patty: Choose a soy or pea protein patty for a meaty texture.
🌶️ Variations of Flavor
Explore different flavor directions by adjusting spices and toppings.
Spicy Version:
Add jalapeño slices, a dash of hot sauce, or a spicy chipotle mayo to give a kick.
Mediterranean Version:
Swap cheddar for Swiss cheese, add avocado slices, and top with arugula and a drizzle of balsamic glaze.
Asian Fusion:
Replace cheddar with pepper jack, add pickled ginger, and drizzle with a soy-ginger glaze for an Asian twist.
⚠️ Dietary Adaptations
Gluten-Free:
Use gluten-free buns or lettuce wraps to replace traditional buns.
Without Lactose:
Use dairy-free cheese alternatives and ensure any sauces used are lactose-free.
Low-Calorie:
Use lean ground turkey instead of beef, reduce bacon to two strips, and use low-fat cheese.
👶 Family/Children Version
For kids, use smaller buns, milder cheese, and omit strong spices. Serve with ketchup and a side of sweet potato fries for a kid-friendly meal.
📦 Conservation and Reheating
🧊 Conservation
Refrigeration:
- Duration: 3 days
- Container: Airtight container
- Tip: Store components separately to keep buns from getting soggy.
Freezing:
- Duration: 2 months
- Method: Wrap each burger tightly in plastic wrap and place in a freezer bag.
- Defrosting: Thaw overnight in the refrigerator before reheating.
💡 For best flavor, consume within 2 months of freezing; reheating too many times degrades texture.
♨️ Reheating
🔥 Oven (Recommended):
- Preheat to 180°C (350°F).
- Wrap the burger in foil.
- Heat for 5‑7 minutes.
- Remove foil and continue 2‑3 minutes for a crisp bun.
⚡ Microwave (Quick):
- Cover with a microwave-safe lid.
- Heat on medium power for 45 seconds.
- Check and heat additional 15 seconds if needed.
🍳 In a Pan:
Heat a non-stick skillet over medium heat, place the burger, cover with a lid for 2 minutes, then uncover to crisp the bun.
🍷 Perfect Pairings
🥗 Side Dishes
- Garlic Herb Roasted Potatoes : Crispy potatoes seasoned with rosemary and garlic complement the burger's savory profile.
- Classic Caesar Salad : The tangy vinaigrette cuts through the richness of the burger.
- Sweet Potato Fries : Sweetness balances the salty bacon.
🍷 Wine/Drink Pairings
- Red Wine – Zinfandel : Its fruitiness balances the savory flavors.
- Beer – American Pale Ale : The slight bitterness cuts through the richness.
- Non-alcoholic : Sparkling water with a splash of lime for freshness.
🍰 To Complete the Meal
Start with a fresh garden salad, follow with the cheeseburger, and finish with a classic New York cheesecake or a warm apple crumble for a comforting finish.
❓ Frequently Asked Questions
Q: Can I use ground turkey instead of beef?
Yes, you can substitute ground beef with ground turkey. Use 100% lean turkey and consider adding a bit of oil or butter to compensate for the lower fat content, ensuring the burger remains juicy. Adjust cooking time slightly as turkey cooks faster.
Q: How can I make the burger gluten-free?
Use gluten-free buns or substitute a lettuce wrap for the bun. Ensure any sauces used are gluten-free (no soy sauce unless gluten-free). Also, verify that the bacon and cheese contain no hidden gluten-containing additives.
Q: Can I prepare the burger ahead of time?
Yes. You can prepare the patties and store them in the fridge for up to 24 hours. Keep them wrapped in plastic wrap or an airtight container. The final assembly and cooking should be done fresh to maintain flavor and texture.
Q: How do I avoid the burger becoming soggy?
Make sure the buns are toasted and apply sauces sparingly. Ensure the patties are well-drained after cooking and place the lettuce directly on the bun to act as a barrier between the sauce and the bun. Avoid stacking too many wet ingredients.
Q: Can I use a different cheese?
Yes, you can substitute cheddar with Swiss, provolone, or pepper jack. Each brings a distinct flavor profile. Ensure the cheese melts well at high temperatures.
Q: How long can I keep the cooked burger in the fridge?
The cooked burger can be stored in an airtight container in the refrigerator for up to 3 days. Reheat using the recommended methods to retain flavor and texture.
🎉 To Your Kitchen!
Cooking this cheeseburger with bacon and cheddar cheese offers a delightful blend of textures and flavors that will impress anyone at your table. From the juicy beef patty to the crisp bacon and melted cheddar, each bite delivers satisfaction. The recipe is designed to be accessible yet refined, perfect for both casual family meals and entertaining guests.
We hope you enjoy crafting this burger as much as we enjoyed creating it. Share your results, ask questions in the comments, and don't forget to rate the recipe.
Have you tried this recipe?
Leave a comment and rating below! Share your photos on Instagram with #CheeseburgerDelight to be featured.
Cheeseburger with Bacon and Cheddar Cheese
A juicy, bacon‑laden cheeseburger that satisfies cravings.
📝 Ingredients
Patty & Bun
Cheese & Bacon
Sauce (optional)
👨🍳 Instructions
- 1
Preheat the oven to 200°C (392°F) and bake bacon for 10 minutes.
- 2
Mix ground beef with salt and pepper, shape into 4 patties.
- 3
Cook patties in a skillet over medium-high heat, 3-4 minutes per side.
- 4
When patties are nearly done, place cheddar on each patty to melt.
- 5
Toast buns lightly in the same skillet.
- 6
Assemble burgers with bacon, lettuce, tomato, and sauce.
- 7
Serve immediately with your favorite side.
- 8
Enjoy!
- 9
Optional: add pickles or onions for extra flavor.
- 10
Share with friends and family.
🥗 Nutrition Facts (per serving)
*Values are approximate.
📚 You Might Also Like
Classic Beef Burger
Bacon Avocado Burger
Spicy Chicken Burger


💬 Comments & Reviews
Leave a Comment
No comments yet. Be the first to share your thoughts!