I still remember the first time I attempted to make a chocolate raspberry cheesecake. It was a disaster of epic proportions — the chocolate seized into grainy clumps, the raspberry swirl turned into a muddy purple mess, and the cheesecake cracked like the Sahara desert. I stood there in my kitchen, staring at this culinary catastrophe, wondering if I should just order takeout and pretend this never happened. But something inside me refused to give up. That failure became an obsession, and after months of testing, tweaking, and tasting more cheesecakes than any human should, I've finally cracked the code to what I firmly believe is the most decadent dessert you'll ever make at home.
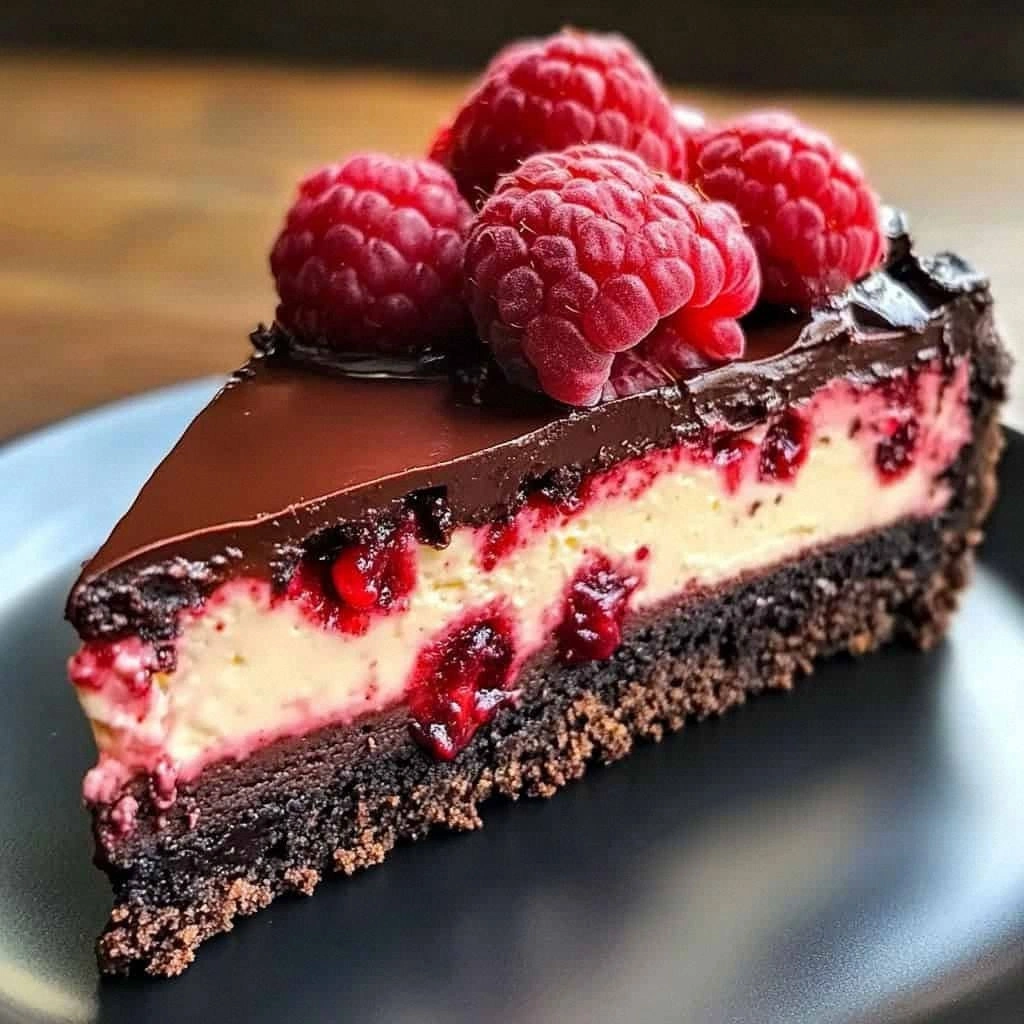
Picture this: a buttery chocolate cookie crust that shatters like thin ice under your fork, giving way to a velvety smooth cheesecake that's so rich and creamy it makes silk feel like sandpaper. The dark chocolate melts on your tongue like velvet, while pockets of tangy raspberry burst through like little jewels of flavor. This isn't just dessert — this is the kind of show-stopping finale that makes dinner guests forget their manners and reach across the table for seconds. I dare you to taste this and not go back for seconds, thirds, and maybe even a sneaky sliver straight from the fridge at midnight.
What makes this version different from every other chocolate raspberry cheesecake recipe floating around the internet? For starters, I've discovered the secret to preventing those dreaded cracks — and it's not a water bath (though we'll use one). The chocolate gets melted into the cream cheese base rather than being mixed in as cocoa powder, creating this incredibly smooth texture that makes store-bought cheesecake taste like cardboard. And those fresh raspberries? They're not just thrown on top as an afterthought. We're creating a concentrated raspberry swirl that ripples through the cheesecake like a beautiful marbled masterpiece.
Let me walk you through every single step — by the end, you'll wonder how you ever made it any other way. If you've ever struggled with cheesecake that sinks, cracks, or tastes more like chocolate-flavored rubber than dessert, you're not alone — and I've got the fix. This recipe is about to become your new secret weapon, the dessert you bring to impress, the one your friends will beg you to make again and again.
What Makes This Version Stand Out
Silky Smooth Texture: Most recipes get this completely wrong. They overmix the batter, incorporate too much air, and end up with a cheesecake that's more like chocolate-flavored sponge. This version uses a specific mixing technique that keeps the texture dense and creamy, like the finest New York cheesecake you've ever tasted.
Intense Chocolate Flavor: We're not playing around with cocoa powder here. Six ounces of real dark chocolate gets melted and folded into the batter, creating depth and complexity that makes other chocolate cheesecakes taste like chocolate milk in comparison. The bitterness of the dark chocolate perfectly balances the sweetness of the cheesecake.
Real Raspberry Swirl: Forget those artificial raspberry extracts or jam. We're making a quick raspberry coulis from fresh berries that gets dolloped and swirled through the batter. Each bite gives you pockets of bright, tangy fruit that cut through the richness like a ray of sunshine.
No More Cracks: The temperature rule I'm about to share will change your cheesecake game forever. Most recipes tell you to cool the cheesecake completely in the oven, but that's actually what causes cracks. I'll show you the exact cooling method that prevents them every single time.
Make-Ahead Magic: This cheesecake actually tastes better after a day in the fridge. The flavors meld and deepen, making it the perfect dessert for entertaining. Future pacing here: picture yourself pulling this out of the fridge, the whole kitchen smelling incredible, while your guests ooh and ahh over your baking prowess.
Crowd-Pleasing Perfection: I brought this to a dinner party last month and watched grown adults fight over the last slice. One friend actually hid a piece in her purse for later. This next part? Pure magic — the combination of chocolate and raspberry hits that nostalgic sweet spot that makes everyone feel like a kid again.
Simple Elegance: Despite sounding fancy, this recipe uses everyday ingredients and straightforward techniques. No special equipment beyond a springform pan, no hard-to-find ingredients, no culinary degree required. Just follow my steps exactly and you'll look like a professional pastry chef.
Inside the Ingredient List
The Foundation Builders
Chocolate cookie crumbs form the backbone of our crust, and here's why they matter more than you'd think. Those 24 chocolate sandwich cookies (cream filling removed, please — we're not animals) create a crust that's both structurally sound and intensely chocolatey. The cocoa in the cookies toasts while baking, developing this incredible depth that graham crackers could never achieve. Skip the cream filling because it makes the crust greasy and prevents it from setting properly. If you can't find chocolate cookies, chocolate graham crackers work, but you'll miss that rich chocolate hit that makes this crust special.
Unsalted butter is our binding agent, and using exactly six tablespoons matters more than you'd think. Too little and your crust crumbles apart like a dry sandcastle. Too much and it becomes an oil slick that seeps up into your cheesecake. The butter should be fully melted but not hot — think warm bath temperature. This helps it bind with the cookie crumbs without making them soggy before they even hit the oven.
The Texture Masters
Thirty-two ounces of cream cheese sounds like overkill until you understand what happens during baking. As the cheesecake cooks, moisture evaporates, concentrating flavors and firming up the texture. Starting with four full packages ensures you end up with a substantial cheesecake that slices cleanly and serves a crowd. The cream cheese must be at room temperature — cold cream cheese creates lumps that no amount of mixing will smooth out. I've tried every shortcut (microwaving, grating, you name it), and nothing beats the patience of letting it soften naturally.
Sour cream might seem like an odd addition, but it's our secret weapon for tang and tenderness. Just a quarter cup adds subtle acidity that balances the richness and prevents the cheesecake from becoming too dense. Greek yogurt works in a pinch, but sour cream has this luxurious mouthfeel that makes each bite feel indulgent. Don't skip it — your cheesecake will taste flat and one-dimensional without this tangy counterpoint.
The Flavor Amplifiers
Dark chocolate is the star here, and quality matters immensely. Those six ounces should be at least 60% cacao, but I prefer 70% for the intense chocolate hit that makes this dessert unforgettable. The chocolate gets melted and cooled slightly before being incorporated — too hot and it'll cook the eggs, too cool and it'll seize into grainy bits. I learned this the hard way when my first attempt turned into chocolate chip cheesecake instead of smooth chocolate cheesecake.
Fresh raspberries bring brightness and acidity that cut through all that richness. One cup might not seem like much when distributed throughout a whole cheesecake, but it's enough to provide those gorgeous pockets of fruit without overwhelming the chocolate. Frozen raspberries work if fresh aren't available, but they release more juice and can make the swirl bleed too much. If you must use frozen, thaw and drain them first.
The Unexpected Heroes
Vanilla extract might seem unnecessary when we're dealing with chocolate and raspberry, but it's the background note that ties everything together. Just one teaspoon enhances both the chocolate and fruit flavors without being detectable on its own. Use real vanilla extract, not the artificial stuff — this is a splurge dessert, and every ingredient should be the best quality you can manage.
Lemon juice in the raspberry swirl isn't just for brightness — it helps the fruit maintain its vibrant color during baking. Without acid, raspberries turn a muddy brown that looks anything but appetizing. Just one tablespoon makes the difference between a stunning ruby swirl and something that looks like it sat in the fridge too long.

The Method — Step by Step
- Start with the crust because it needs time to firm up while you make the filling. Blitz those chocolate cookies in a food processor until they resemble fine sand — we're talking no chunks bigger than a grain of rice. If you don't have a food processor, throw them in a zip-top bag and whale on them with a rolling pin until they're properly pulverized. Mix the crumbs with sugar (just two tablespoons to enhance the chocolate flavor without making it sweet), then pour in the melted butter. Here's the key: stir until every crumb is coated and the mixture looks like wet sand at the beach. Press this into your springform pan using the bottom of a measuring cup, working it up the sides about an inch. The bottom should be even and compact — press hard enough that it feels solid but not so hard that it becomes impenetrable. Pop this in the freezer while you move on to the filling.
- Now for the cream cheese base, and this is where most recipes go wrong. Beat the cream cheese on medium speed for exactly two minutes — no more, no less. Overbeating incorporates air that will cause cracks and a fluffy texture more appropriate for mousse than cheesecake. The cream cheese should look smooth and slightly fluffy but still dense. Add the sugar gradually, about a quarter cup at a time, beating just until incorporated. This method prevents the sugar from drawing out moisture and creating a grainy texture. Scrape down the bowl religiously — unmixed cream cheese will create white streaks in your finished cheesecake that look like mistakes (because they are).
- Time for the chocolate, and this is the moment of truth. Melt your dark chocolate in short bursts in the microwave or over a double boiler, stirring until it's smooth and glossy. Let it cool for about five minutes — it should still be liquid but not hot enough to burn your finger. Pour the chocolate into the cream cheese mixture and beat just until combined. The mixture will transform into this gorgeous mocha color that makes you want to dive in face-first. But resist the urge — we're not done yet.
- Eggs go in next, but treat them like fragile treasures. Beat them in a separate bowl first (this prevents shells and ensures even mixing), then add them to the chocolate-cream cheese mixture. Mix on low speed just until incorporated — overmixing here creates a souffle-like texture that will rise and fall, causing cracks. The batter should be smooth and pourable but still thick enough to mound slightly when you lift the beater. If it looks like chocolate soup, you've gone too far.
- The raspberry swirl comes together while the cheesecake base rests. Combine raspberries, sugar, and lemon juice in a small saucepan over medium heat. Cook for about five minutes, stirring occasionally, until the berries break down and the mixture thickens slightly. Don't walk away from the stove here — raspberries go from perfect to burnt in the blink of an eye. Strain the mixture through a fine-mesh sieve to remove seeds (unless you like the texture, in which case skip this step). You should end up with about half a cup of vibrant ruby sauce that smells like summer in a bowl.
- Pouring the batter into your prepared crust is an art form. Start in the center and let it spread naturally to the edges — this prevents air bubbles that create holes in your finished cheesecake. Once all the batter is in, gently tap the pan on the counter to release any trapped air. Now comes the fun part: dollop the raspberry sauce in random spots over the top. Use a toothpick or skewer to create swirls, but don't overmix — you want distinct ribbons of raspberry, not a homogenous purple mess.
- The water bath is non-negotiable for preventing cracks, but here's the insider trick: wrap your springform pan in three layers of heavy-duty foil, making sure the foil comes up at least two inches on all sides. Place the pan in a roasting pan and pour hot water into the outer pan until it comes halfway up the sides of the springform. The steam creates a humid environment that prevents the surface from drying out and cracking. Carefully transfer this setup to a 325°F oven and bake for 55-65 minutes.
- Testing for doneness requires patience and a gentle hand. The edges should be set but the center should still jiggle slightly when you gently shake the pan — think Jell-O consistency. If it sloshes like liquid, give it another ten minutes. The top should be lightly golden and may have a few small cracks around the edges (these will close as it cools). Turn off the oven and crack the door open with a wooden spoon. Let the cheesecake cool in the oven for exactly one hour — this gradual cooling prevents the dramatic temperature change that causes major cracks.
- After the hour, remove the cheesecake from the water bath and run a thin knife around the edge to release it from the sides of the pan. This prevents cracking as it contracts during cooling. Let it cool completely on a wire rack, then refrigerate for at least four hours or overnight. I know it's torture to wait, but cutting into a warm cheesecake is like cutting into a cloud — it just doesn't work. The flavors need time to meld and the texture needs time to set up properly.
- The ganache topping comes together while the cheesecake chills. Heat the heavy cream until it's just steaming, then pour it over the chopped chocolate. Let it sit for two minutes (set a timer — this matters), then whisk until smooth and glossy. It should be pourable but thick enough to coat the back of a spoon. If it's too thin, let it cool for a few minutes to thicken. Pour this over the chilled cheesecake, letting it drip artfully down the sides. Top with fresh raspberries and chocolate shavings for a dessert that looks like it came from a Parisian patisserie.
Insider Tricks for Flawless Results
The Temperature Rule Nobody Follows
Room temperature isn't just a suggestion — it's the law when it comes to cheesecake. Cold cream cheese won't blend properly, creating those dreaded lumps that no amount of mixing will fix. Cold eggs won't incorporate smoothly, leading to a curdled-looking batter. And don't even get me started on what happens when you add cold sour cream to warm chocolate (spoiler: it seizes into a grainy mess). Take everything out at least two hours before you start, or better yet, the night before. Yes, even the eggs. Yes, even the sour cream. Your future self will thank you when you're not standing over the mixer muttering curse words while lumps mock you from the bowl.
Why Your Nose Knows Best
That sizzle when the cheesecake hits the oven? Absolute perfection. But here's what nobody tells you: the smell changes as it bakes, and you can actually use your nose to gauge doneness. For the first 30 minutes, you'll smell sweet cream cheese and vanilla. Around minute 40, the chocolate aroma intensifies and your kitchen starts smelling like a chocolate factory. At minute 50, you'll detect the faintest caramel note — this is when you start checking. When the chocolate smell becomes almost intoxicating and you can detect a hint of toasted nuts, your cheesecake is done. Trust your nose; it's been evolving for millions of years to detect exactly these kinds of delicious transformations.
The 5-Minute Rest That Changes Everything
After the cheesecake finishes baking, resist the urge to immediately remove it from the water bath. Let it sit for exactly five minutes first. This brief rest allows the residual heat to finish setting the center without overcooking the edges. During this time, the proteins finish coagulating and the moisture redistributes itself evenly. Skip this step and you'll end up with a cheesecake that's perfectly set around the edges but still liquid in the center. I learned this the hard way when I got impatient and ended up with chocolate cheesecake soup. Five minutes feels like an eternity when you're staring at dessert, but it's the difference between amateur and professional results.
The Release Technique That Prevents Cracks
Running a knife around the edge while the cheesecake is still warm seems counterintuitive, but it's crucial for preventing cracks. As the cheesecake cools, it contracts slightly. If it's still attached to the sides of the pan, it tears itself apart trying to pull away — hence those massive cracks that run from edge to edge. Use a thin, flexible knife and run it between the cheesecake and the pan in one smooth motion. Don't saw back and forth like you're cutting bread; one clean pass is all you need. The cheesecake should spin freely in the pan when you're done. This simple 30-second step will save you from the heartbreak of perfect flavor ruined by earthquake-like fissures.
The Overnight Magic Trick
Here's where patience becomes your secret weapon. While you can technically serve this cheesecake after four hours of chilling, it reaches its peak after 24 hours in the refrigerator. During this time, magical things happen: the chocolate flavors deepen and become more complex, the raspberry swirl infuses the surrounding cheesecake with its fruity essence, and the texture transforms from merely firm to impossibly creamy. The moisture distributes itself evenly, eliminating any slight graininess and creating that velvety mouthfeel that makes grown adults close their eyes in bliss. I'll be honest — I ate half the batch before anyone else got to try it, and the slices that had been chilled overnight were exponentially better than the ones I couldn't resist eating immediately.
Creative Twists and Variations
This recipe is a playground. Here are some of my favorite ways to switch things up:
White Chocolate Raspberry Dream
Swap the dark chocolate for white chocolate and you've got a completely different dessert. The white chocolate makes the cheesecake sweeter and more delicate, perfect for those who find dark chocolate too intense. Use the same amount (six ounces) but reduce the sugar in the filling by a quarter cup since white chocolate is naturally sweeter. The raspberry swirl becomes the star here, creating beautiful pink ribbons against the pale cheesecake. This version is especially popular with kids and those who claim they "don't like cheesecake" — they always change their minds after one bite.
Mocha Madness
Add two tablespoons of instant espresso powder to the melted chocolate and transform this into a mocha cheesecake that coffee lovers will worship. The bitterness of the coffee enhances the chocolate flavor while adding complexity that makes people ask "what's in this?" in the best possible way. Top with chocolate-covered espresso beans instead of raspberries for a dessert that doubles as an after-dinner coffee. A friend tried skipping this step once — let's just say it didn't end well for their dinner party reputation.
Salted Caramel Swirl
Replace the raspberry swirl with homemade salted caramel for a sophisticated twist that plays beautifully with the dark chocolate. Make the caramel by cooking sugar until it's deeply amber (almost burnt), then whisk in heavy cream and a generous pinch of flaky salt. The sweet-salty caramel creates this incredible contrast with the bitter chocolate, and the gooey ribbons make each slice look like edible art. This version is what you serve when you want to impress people who think they've had every possible cheesecake variation.
Tropical Chocolate Escape
Add the zest of one orange and replace the raspberry swirl with passion fruit pulp for a tropical twist that transports you straight to a beach in Hawaii. The citrus brightens the chocolate while the tangy passion fruit adds an exotic note that makes this feel like a vacation dessert. Top with toasted coconut flakes and serve with a rum-spiked whipped cream for the full tropical experience. This is hands down the best version you'll ever make for summer dinner parties.
Peanut Butter Fudge Remix
Swirl in half a cup of creamy peanut butter with the raspberry sauce for a PB&J-inspired cheesecake that hits all those nostalgic notes. The peanut butter adds richness and that familiar comfort food flavor, while the raspberries keep it from becoming too heavy. Use natural peanut butter (the kind you have to stir) for the best texture — the stabilizers in regular peanut butter can make the swirl grainy. This version is guaranteed to disappear faster than any other dessert at a potluck.
Mint Chocolate Chip Surprise
Add one teaspoon of peppermint extract to the filling and fold in half a cup of mini chocolate chips for a mint chocolate chip cheesecake that tastes like your favorite ice cream flavor in dessert form. Replace the raspberry swirl with crushed mint candies that melt into green ribbons during baking. The mint cuts through the richness while the chocolate chips add delightful texture. Serve this one chilled with a dollop of whipped cream for the full ice cream parlor experience.
Triple Chocolate Threat
For the serious chocolate addicts (I see you, and I respect you), make the crust with chocolate wafer cookies, add cocoa powder to the filling, and top with both the chocolate ganache AND chocolate shavings. This creates layers upon layers of chocolate in different forms — crunchy, creamy, and smooth. It's chocolate in stereo, chocolate in surround sound, chocolate that makes you wonder why you ever bothered with other flavors. Fair warning: this version has been known to cause spontaneous declarations of love from dinner guests.
Storing and Bringing It Back to Life
Fridge Storage
This cheesecake keeps beautifully in the refrigerator for up to five days, making it perfect for advance preparation. Cover it loosely with plastic wrap or store it in an airtight container — but here's the key: add a paper towel under the lid to absorb excess moisture. This prevents condensation from forming on the surface and making the ganache sticky. Store it on a shelf, not in the door, where the temperature stays more consistent. The flavors actually improve after the first day as everything melds together. Slice with a warm knife (dip in hot water and wipe dry) for clean cuts that show off those beautiful swirls.
Freezer Friendly
This cheesecake freezes like a dream for up to three months, making it a fantastic make-ahead dessert for special occasions. Slice it first, then wrap individual pieces in plastic wrap followed by aluminum foil. This way you can thaw exactly what you need without defrosting the whole cheesecake. Thaw overnight in the refrigerator rather than at room temperature — this prevents condensation from forming on the ganache. The texture might be slightly denser after freezing, but the flavor remains perfect. Pro tip: freeze the slices on a baking sheet first, then wrap them — this prevents the wrapping from squishing your beautiful dessert.
Best Serving Method
Bring the cheesecake to room temperature for 30 minutes before serving for the best texture and flavor. Cold mutes the chocolate notes and makes the cheesecake taste less sweet than intended. If you've stored it in the freezer, let it thaw completely in the fridge first, then the 30-minute room temperature rest. For an extra-special presentation, warm your serving plates slightly — this keeps the cheesecake from becoming too firm as it sits. Add fresh raspberries and chocolate shavings just before serving so they don't weep or lose their visual appeal. And here's a secret: a tiny pinch of flaky salt on each slice just before serving makes the chocolate sing.