Picture this: you’re halfway through a week of bland, reheated takeout, craving something that feels like a fresh, sizzling adventure. You open the fridge, find a handful of leftover rotisserie chicken, a can of black beans, and a jar of that slightly burnt‑but‑still‑delicious red enchilada sauce you bought last month. The idea hits you like a lightning bolt: turn those pantry staples into a high‑protein, crowd‑pleasing dinner that’s practically a showstopper.
When I first tried this version, the kitchen smelled of cumin and garlic powder, a savory perfume that made my eyes water in anticipation. The sight of the tortillas, already softened by a quick steam, felt like a promise of crisp edges that would crack like thin ice when you bite into them. The sizzle of the filling in the pan was music, a rhythmic crackle that told me the flavors were about to mingle in perfect harmony. The anticipation of the first bite—tangy yogurt, smoky beans, and a burst of chili—was almost too much to bear, and I could’t help but grin like a kid in a candy store.
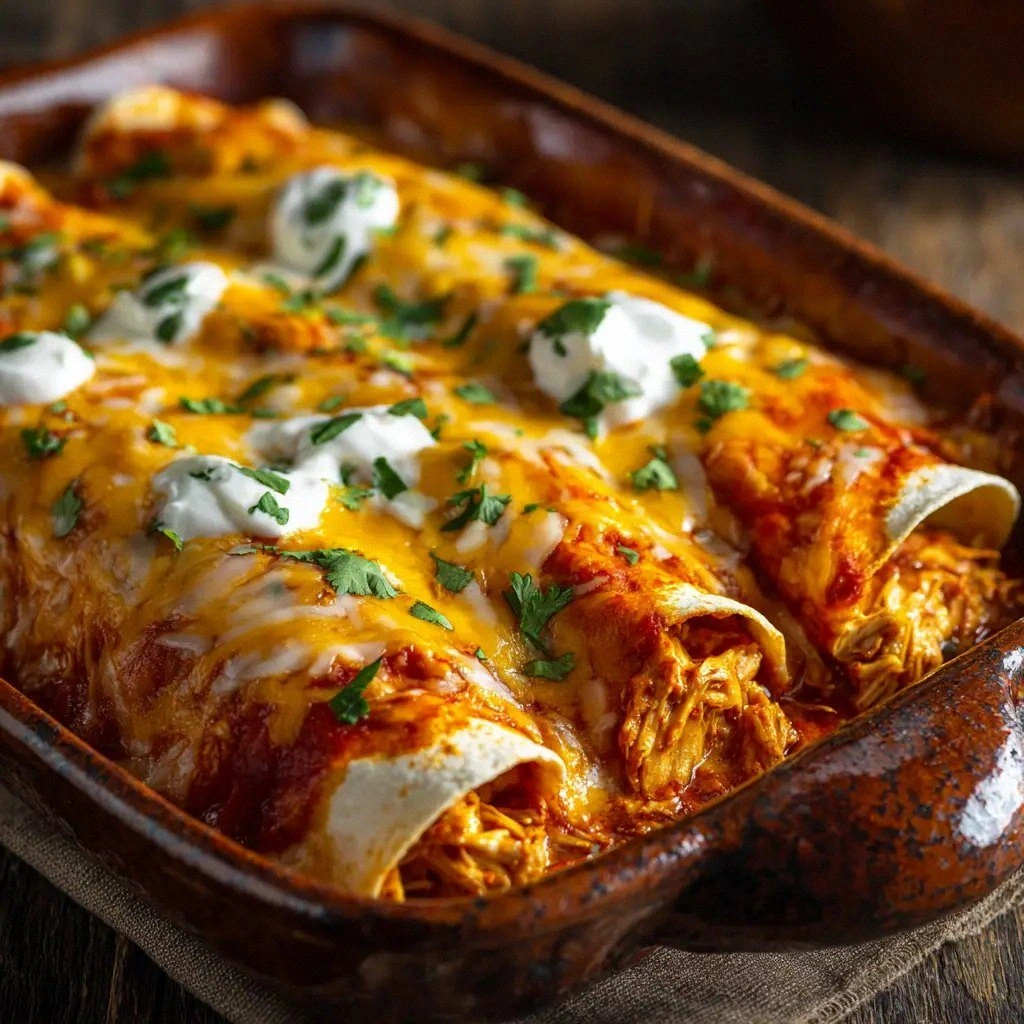
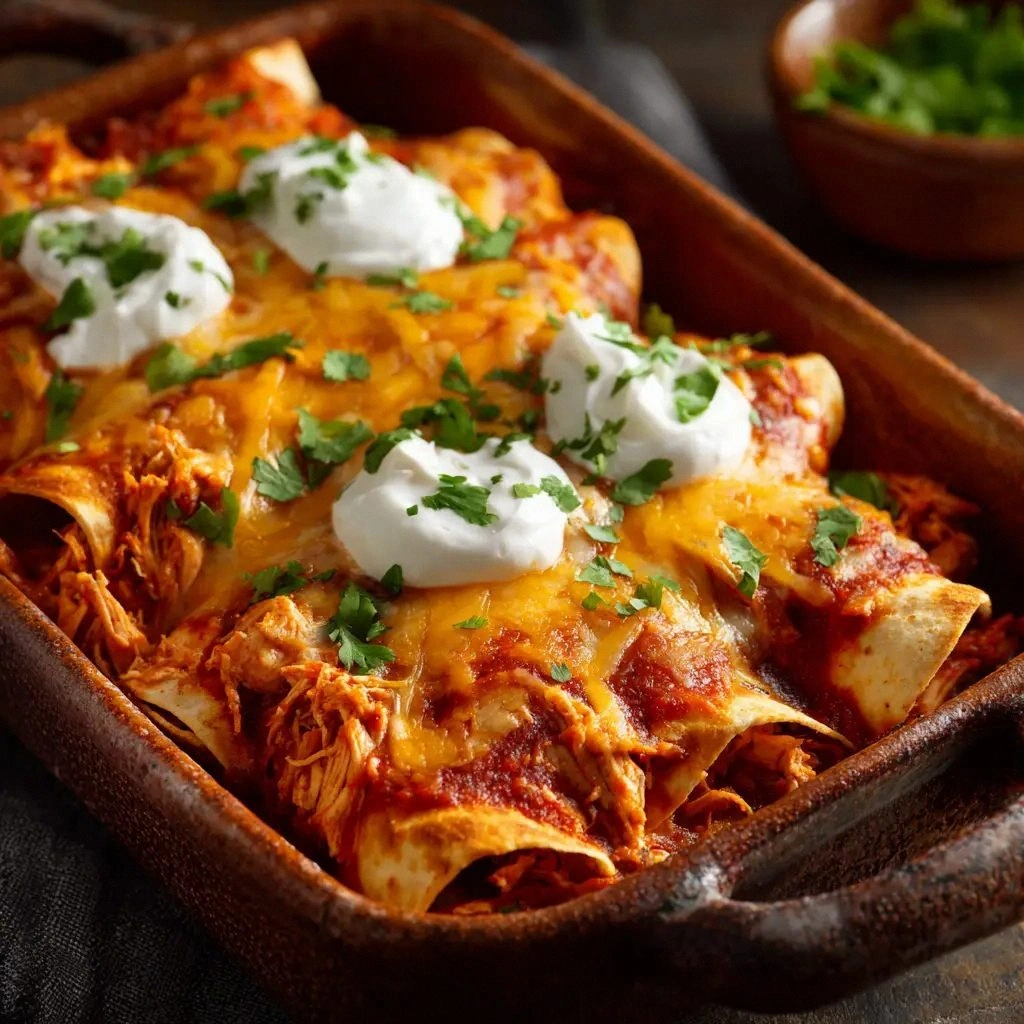
What sets this recipe apart isn’t just the protein punch; it’s the way each element is orchestrated to create a symphony of textures and tastes. The Greek yogurt acts as a velvety, creamy counterpoint that balances the heat from the chili powder, while the black beans add a subtle earthiness that grounds the dish. The tortillas are the canvas, but they’re not just passive carriers—they’re infused with a light, airy chew that holds everything together. And the final flourish of melted cheese? It’s a glossy, gooey crown that crowns each enchilada with a satisfying, buttery finish.
I dare you to taste this and not go back for seconds. If you’ve ever struggled to find a high‑protein, low‑carb dinner that doesn’t feel like a compromise, this is hands down the best version you’ll ever make at home. Picture yourself pulling this out of the oven, the whole kitchen smelling incredible, and the first bite sending a wave of satisfaction through your taste buds. Let me walk you through every single step—by the end, you’ll wonder how you ever made it any other way.
What Makes This Version Stand Out
- Flavor Depth: The blend of Greek yogurt, chili powder, and cumin creates a layered taste that feels both comforting and adventurous.
- Protein Power: With shredded chicken and high‑protein tortillas, each serving packs more than 25 grams of lean protein.
- Texture Contrast: Crispy tortilla edges, creamy filling, and molten cheese combine for a mouth‑watering experience.
- Time Efficiency: Prep takes just 15 minutes, and the dish cooks in 30 minutes—perfect for busy weeknights.
- Make‑Ahead Friendly: Assemble the enchiladas and refrigerate; bake them later for a hassle‑free meal.
- Ingredient Simplicity: No exotic spices or hard‑to‑find items—everything is pantry‑friendly.
- Versatility: Swap in your favorite protein, or adjust the heat level to suit your family’s taste.
- Kid‑Approved: The cheesy, mild heat makes it a hit with even the pickiest eaters.
Alright, let's break down exactly what goes into this masterpiece…
Inside the Ingredient List
The Flavor Base
At the heart of any great enchilada is the flavor base—here it’s a symphony of Greek yogurt, chili powder, cumin, and garlic powder. The yogurt not only adds creaminess but also cuts through the richness of the cheese, providing a tangy lift that keeps the dish from feeling heavy. Chili powder brings a gentle heat that dances on the palate, while cumin offers an earthy, nutty undertone that grounds the flavor profile. Garlic powder adds a subtle, savory punch that ties everything together.
Skipping the yogurt would leave the filling dry and unbalanced; the sauce would feel like a flat, one‑dimensional layer. If you’re looking for a dairy‑free alternative, a splash of coconut cream or a dollop of tahini can mimic the yogurt’s role, though the flavor will shift slightly toward the tropical side. For a lower‑fat version, opt for non‑fat Greek yogurt; the protein content stays high while the calorie count dips.
The Protein Powerhouses
The shredded chicken breast is the star protein source. Using pre‑cooked, shredded chicken ensures a quick assembly and a consistent texture that’s tender yet firm. The black beans contribute both protein and fiber, making each bite more filling and helping to keep blood sugar levels steady. Together, they create a protein density that satisfies the body and the appetite.
If you’re a fan of bold flavors, consider adding a spoonful of smoky chipotle powder to the chicken mixture. For a vegetarian twist, replace the chicken with tofu or tempeh, seasoned with the same spice blend for a comparable bite. Remember, the beans should be rinsed and drained to reduce sodium, especially if you’re watching your salt intake.
The Texture Crew
High‑protein tortillas are the foundation that holds everything together. Their thicker, denser profile resists tearing when filled and rolled, and they hold the cheese and sauce without breaking apart. The tortillas also provide a slightly chewy bite that contrasts with the creamy filling.
When warming tortillas, a quick steam in a microwave or a splash of water in a skillet works wonders. Avoid over‑heating, as they’ll become brittle. If you prefer a gluten‑free option, look for certified gluten‑free tortillas that still offer a substantial protein content; many brands now provide a protein‑enhanced, grain‑free version.
The Final Flourish
The red enchilada sauce is the liquid that binds the dish together and adds a savory, slightly sweet kick. A good sauce should be thick enough to coat the tortillas without dripping excessively, ensuring each bite is moist but not soggy. The shredded Mexican cheese blend melts into a glossy, golden layer that adds richness and a satisfying umami note.
To elevate the sauce, consider adding a splash of lime juice or a pinch of smoked paprika for extra depth. If you’re on a low‑sodium diet, look for reduced‑salt versions of the sauce or make your own by simmering canned tomatoes with spices. The cheese blend should be a mix of cheddar, Monterey Jack, and a bit of mozzarella for that perfect melt.
Everything’s prepped? Good. Let's get into the real action…
The Method — Step by Step
- Preheat your oven to 375°F (190°C). While the oven warms, gather all your ingredients on the counter. A clean workspace helps keep the process smooth and reduces the chance of cross‑contamination. The preheating ensures a consistent baking environment for the cheese to melt evenly.
- In a large mixing bowl, combine the shredded chicken, Greek yogurt, black beans, chili powder, cumin, and garlic powder. Stir until the mixture is evenly coated and the beans are evenly distributed. This is the moment of truth—if the mixture feels dry, add a splash of milk or more yogurt to bring it together.
- Heat a skillet over medium heat and lightly oil it. Warm each tortilla for about 15 seconds on each side, just enough to make them pliable. If you prefer a softer tortilla, wrap them in a damp paper towel and microwave for 10–15 seconds.
- Spread a generous spoonful of the filling onto the center of each tortilla, leaving a small border of about an inch. The filling should be spread in a line, not a blob, so that it doesn’t spill out when you roll. This technique keeps the enchiladas neat and ensures even cooking.
- Fold the sides of the tortilla over the filling, then roll tightly from the bottom up. The roll should be snug but not so tight that it tears. Once rolled, place each enchilada seam‑side down in a baking dish, arranging them in a single layer.
- Pour the enchilada sauce evenly over the rolled tortillas, making sure each one is covered. The sauce should be thick enough to coat the tortillas but not so watery that it pools at the bottom of the dish.
- Sprinkle the shredded Mexican cheese blend over the top of the sauce. The cheese will melt into a golden crust that’s both fragrant and gooey. The cheese’s melting point should be low enough to create a silky surface without burning.
- Bake in the preheated oven for 25–30 minutes, or until the cheese is bubbling and the edges of the tortillas are slightly crisp. Keep an eye on the cheese—if it starts to brown too quickly, tent the dish with foil.
- Remove the enchiladas from the oven and let them rest for 5 minutes. This pause allows the sauce to thicken slightly and the flavors to meld together. Resting also makes the enchiladas easier to serve.
- Serve hot, optionally garnished with fresh cilantro, diced tomatoes, or a dollop of sour cream. Pair with a side of Mexican rice or a simple green salad for a complete meal.
That's it — you did it. But hold on, I've got a few more tricks that'll take this to another level…
Insider Tricks for Flawless Results
The Temperature Rule Nobody Follows
Many cooks bake at 400°F, hoping for a quicker cook, but that temperature can cause the cheese to scorch before the filling is fully heated. Stick to 375°F and let the enchiladas bake for the full 30 minutes. This slower, steady heat ensures the sauce thickens without drying out the tortillas and gives the cheese a golden, bubbly finish.
Why Your Nose Knows Best
Before you open the oven door, pause and inhale the aroma of the bubbling cheese and simmering sauce. Your nose is a reliable indicator of doneness; if it smells like a warm, savory casserole, your enchiladas are ready. Trusting your senses over a timer can prevent over‑cooking and preserve moisture.
The 5-Minute Rest That Changes Everything
After baking, let the enchiladas sit for 5 minutes. This rest period allows the sauce to thicken slightly, making each bite less runny and more cohesive. It also gives the cheese a chance to set, preventing it from sliding off when you plate the dish.
Keep It Moist: Add a Splash of Water
When reheating leftovers, add a tablespoon of water to the dish before covering it with foil. This creates steam, rehydrating the tortillas and filling without making the dish soggy. The moisture helps the cheese re‑melt into a luscious coating.
Make‑Ahead Magic
Assemble the enchiladas, cover tightly with foil, and refrigerate for up to 24 hours. When ready to bake, simply pop them in the oven at 375°F for 30 minutes. This method saves time on busy nights and keeps the flavors fresh.
Creative Twists and Variations
This recipe is a playground. Here are some of my favorite ways to switch things up:
Spicy Chipotle Kick
Swap the chili powder for chipotle in adobo sauce and add a tablespoon of adobo sauce to the filling. The smoky heat will transform the dish into a bold, adventurous bite that pairs beautifully with a cool cucumber salad.
Veggie‑Loaded Fiesta
Omit the chicken and add sautéed bell peppers, corn, and zucchini to the filling. The vegetables bring color, crunch, and a sweet counterbalance to the savory sauce.
Tex‑Mex Fusion
Use a Mexican cheese blend that includes queso fresco and a dash of cumin. The fresh, crumbly cheese adds a creamy texture that melts into the enchiladas, while cumin deepens the earthiness.
Low‑Sodium Warrior
Choose a low‑sodium enchilada sauce and rinse the beans thoroughly. Add a splash of lime juice and fresh cilantro to brighten the flavor profile without relying on salt.
Gluten‑Free Delight
Replace the high‑protein tortillas with certified gluten‑free tortillas that have a protein boost. The texture remains sturdy enough to hold the filling, and the dish stays protein‑dense.
Breakfast Edition
Use scrambled eggs as the protein base, fold in the beans, and top with shredded cheese. Bake as usual, and serve with a side of fresh fruit for a hearty, protein‑rich breakfast.
Storing and Bringing It Back to Life
Fridge Storage
Store assembled, unbaked enchiladas in an airtight container for up to 24 hours. When ready to cook, bake at 375°F for 30 minutes. This method keeps the tortillas from drying out and preserves the filling’s moisture.
Freezer Friendly
Wrap each enchilada in parchment paper and place them in a freezer bag. Freeze for up to 3 months. When reheating, thaw overnight in the fridge, then bake at 375°F for 35 minutes, covering with foil for the last 10 minutes.
Best Reheating Method
Reheat leftovers in a skillet over medium heat, adding a splash of water and covering with foil. The steam keeps the tortillas tender and the sauce from drying. Once heated through, finish with a quick burst of cheese on top to restore that molten finish.