I was standing in my kitchen on a rainy Saturday, staring at a half‑finished batch of sugar cookies that looked like they’d been trampled by a toddler. The icing on them was a sad, cracked glaze that reminded me of old paint peeling off a fence – nothing about it screamed “celebration.” I dared my roommate to taste it, and she immediately said, “I’d rather eat cardboard.” That moment sparked a fire in me: I was going to create an icing so luscious, so smooth, that even the most skeptical palate would surrender without a second thought. I grabbed my whisk, a handful of vanilla beans, and set out on a quest to turn that disaster into a masterpiece.
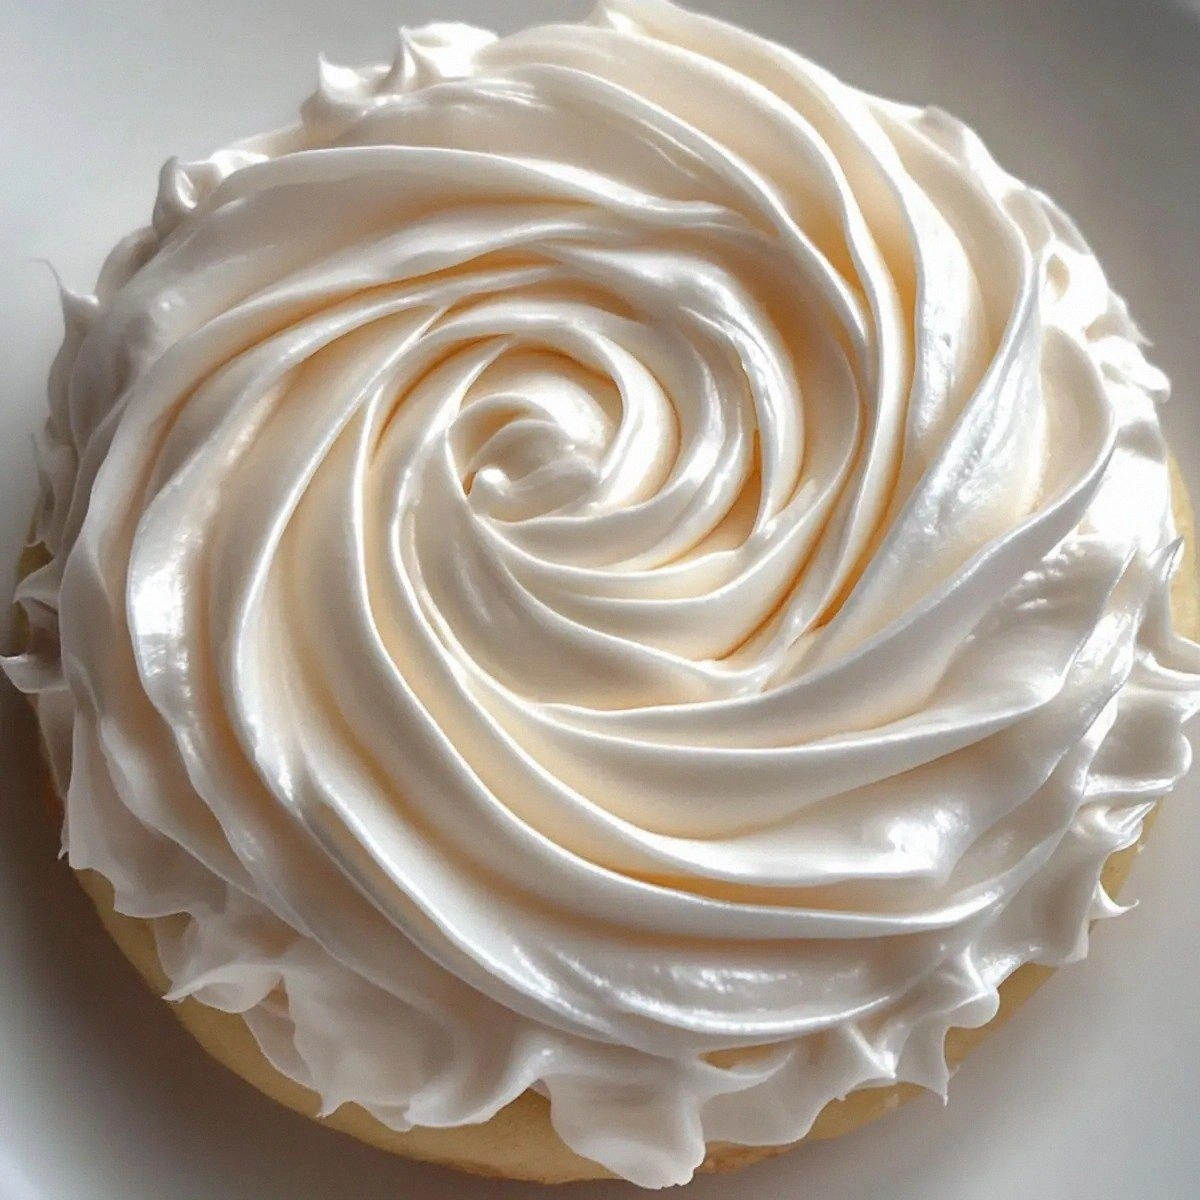
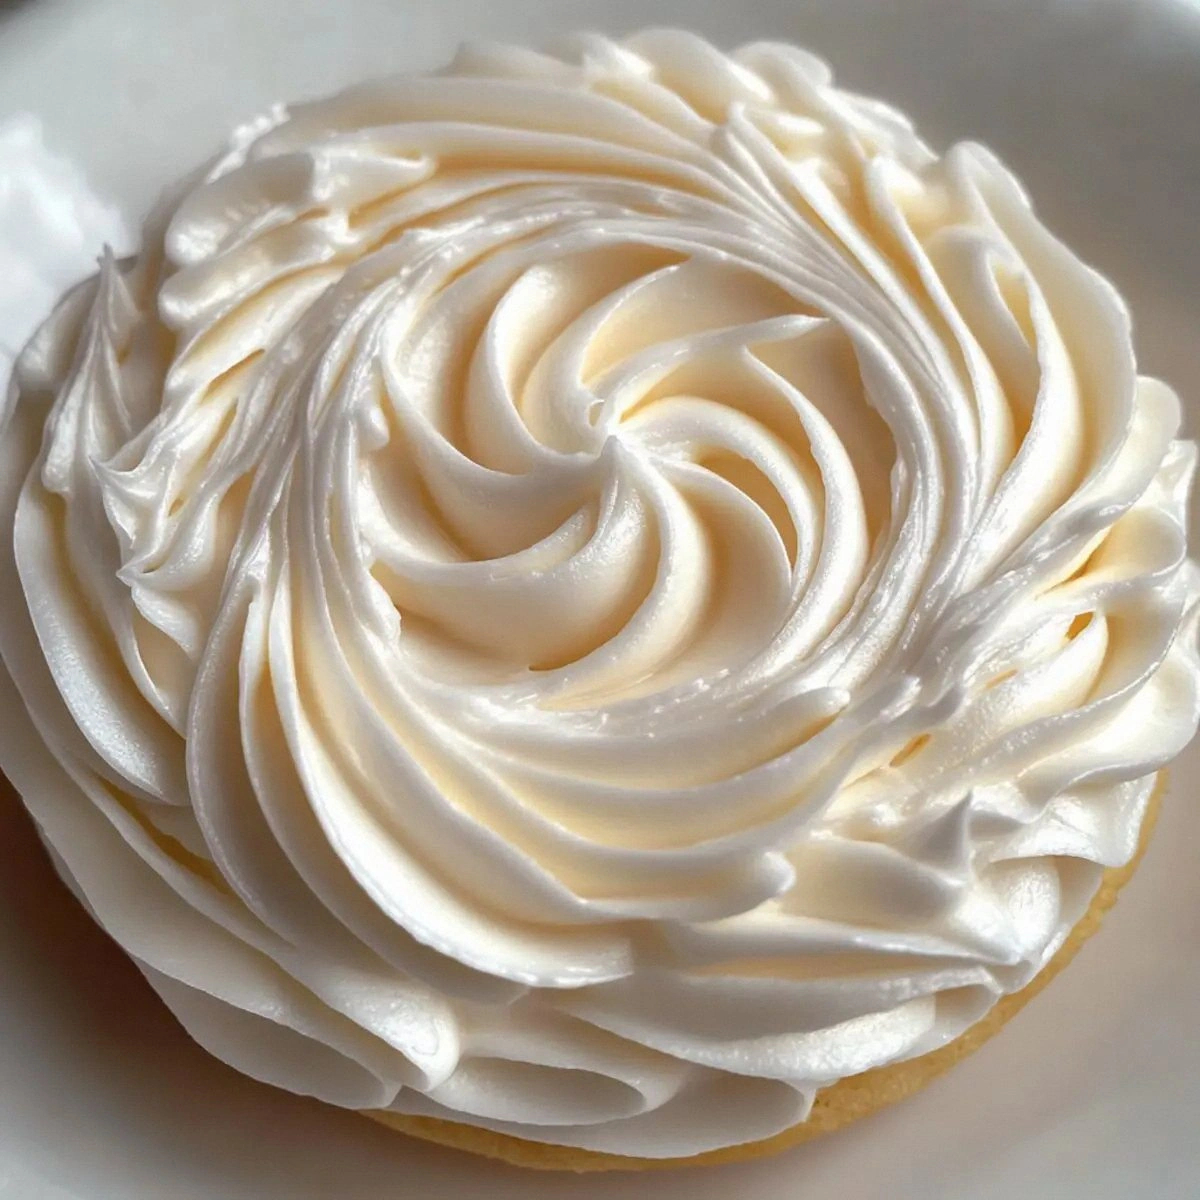
Picture this: the kitchen humming with the gentle whir of a hand‑mixer, the air thick with the sweet perfume of vanilla that makes you feel like you’re walking through a field of blooming orchids. The sound of the egg whites being beaten into glossy peaks is like a tiny thunderstorm in a glass bowl, and the powdery snow of confectioners’ sugar falling into the mix creates a soft, visual snowfall that instantly lifts your mood. When the mixture finally reaches that perfect, silk‑smooth consistency, it clings to the back of a spoon like a glossy satin ribbon, catching the light in a way that makes you want to spread it on everything in sight. The texture is so buttery and airy that it practically melts on your tongue, leaving behind a lingering vanilla kiss that whispers “more.”
What makes this version a total game‑changer? Most royal icing recipes either end up too stiff, cracking the moment you try to pipe a delicate flower, or they stay so runny they slide off the cookie like a greased sled. I’ve cracked the code by balancing the protein power of egg whites with the stabilizing magic of cream of tartar and the luxurious depth of pure vanilla extract. The secret isn’t a hidden ingredient; it’s the method, the timing, and a dash of patience that turns a simple glaze into a velvety veil that hugs every curve of your cookie. I dare you to taste this and not go back for seconds – because you won’t be able to stop.
Let me walk you through every single step — by the end, you’ll wonder how you ever made it any other way. Okay, ready for the game‑changer? This next part? Pure magic. Stay with me here — this is worth it.
What Makes This Version Stand Out
- Taste: The vanilla is not just a hint; it’s a full‑bodied, buttery note that sings from the first bite to the last, turning a plain cookie into a dessert experience.
- Texture: Silky, glossy, and just the right amount of body to hold intricate piping designs without cracking or sliding.
- Simplicity: Only five core ingredients, all pantry staples, yet the result feels like it belongs in a high‑end patisserie.
- Uniqueness: The combination of cream of tartar and a generous splash of vanilla creates a flavor profile that most “basic” royal icings lack.
- Crowd Reaction: Guests invariably ask, “What’s in this?” and you get to brag about your secret technique.
- Ingredient Quality: Using premium vanilla extract makes all the difference; cheap imitations will leave you with a flat taste.
- Method: The slow‑add water technique ensures you achieve the perfect consistency without over‑diluting.
- Make‑Ahead Potential: This icing can be stored for up to a week, retaining its glossy sheen and flavor.
Inside the Ingredient List
The Flavor Base
The star of this show is vanilla extract. A teaspoon may sound modest, but when you choose a pure, high‑quality extract, it delivers a depth that artificial flavors can’t match. It infuses the icing with a warm, aromatic backbone that makes each bite feel like a cozy hug. If you’re feeling adventurous, you can swap it for a vanilla bean paste for an even richer, speckled texture that adds visual appeal.
The Texture Crew
Powdered sugar is the foundation, providing sweetness and the fine structure that gives the icing its smoothness. Four cups may look like a lot, but because it’s sifted, it dissolves effortlessly into the egg whites, preventing any gritty feel. Egg whites bring protein, which, when beaten, creates a stable foam that holds the icing’s shape. Using three large egg whites ensures enough structure without making the icing overly stiff. Finally, cream of tartar stabilizes the foam, preventing it from collapsing and giving the icing that glossy finish. Skipping it is a common mistake that leads to a watery, uneven glaze.
The Unexpected Star
Water is the silent hero. It’s added in a controlled fashion to achieve the exact consistency you need for piping or flooding. Too much water and you’ll have a runny mess; too little and the icing will be too thick to spread. Think of it as the conductor of an orchestra – it brings all the elements together in perfect harmony.
The Final Flourish
When you’re buying powdered sugar, look for a brand that’s labeled “superfine” – it dissolves faster and gives you that silk‑like finish without any grainy residue. For the egg whites, I always recommend using fresh, room‑temperature eggs; they whip up more quickly and hold air better than chilled ones. As for cream of tartar, a little goes a long way – a single teaspoon is enough to stabilize the entire batch.
Everything’s prepped? Good. Let’s get into the real action…
The Method — Step by Step
Start by sifting the powdered sugar into a large mixing bowl. The fine grains should fall like fresh snow, creating a fluffy cloud that will later dissolve into a silky base. I always take a moment to admire the snow‑like pile – it’s a visual cue that you’re on the right track. Once sifted, set the bowl aside for a few seconds to let any static settle.
In a separate, clean bowl, add the three large egg whites. Begin beating on medium speed until they become frothy, then increase to high speed and add the cream of tartar. The mixture will start to form soft peaks, and you’ll hear a faint, satisfying whirr that signals the protein is unfolding. This is the moment where the magic of structure begins.
Slowly drizzle the vanilla extract into the beating egg whites while the mixer is still running. The aroma will instantly fill the kitchen, and you’ll notice the mixture taking on a slightly richer hue. This step is crucial because the vanilla needs to be fully incorporated before the sugar comes in, ensuring every molecule of flavor is evenly distributed.
Now, the key: add the sifted powdered sugar a little at a time. Begin with a third of the sugar, let the mixer run on low, and watch the mixture transform from a thin liquid into a thick, glossy paste. The bowl will look like a snowstorm in motion, and you’ll feel the resistance increase as the sugar absorbs the liquid. Keep adding in batches, pausing to scrape the sides, until the sugar is fully integrated.
At this stage, test the consistency by lifting the whisk. The icing should form a soft peak that holds its shape for a few seconds before gently folding back. If it’s too stiff, add a few drops of water; if it’s too runny, sprinkle in a bit more powdered sugar. Remember, the goal is a spreadable yet pipe‑ready texture that will sit on cookies like a satin sheet.
Transfer the icing to a piping bag fitted with a small round tip for intricate designs, or a larger tip if you’re flooding whole cookies. Before you start, give the bag a gentle tap to remove any air bubbles – those can cause cracks later on. If you’re using a squeeze bottle, you’ll have even finer control over the flow.
Apply the icing to your cooled cookies. For a smooth flood, start in the center and let the icing naturally flow to the edges. The edges should begin to pull away from the surface, creating a clean line that looks professionally done. Let the icing set at room temperature for about 30 minutes; it will harden to a matte finish while retaining that luscious vanilla scent.
Finally, step back and admire your work. The finished cookies should glisten with a subtle sheen, each one looking like a tiny work of art. If you’re feeling extra proud, snap a photo – trust me, Instagram will thank you. That’s it — you did it. But hold on, I’ve got a few more tricks that’ll take this to another level…
Insider Tricks for Flawless Results
The Temperature Rule Nobody Follows
Keep your egg whites at room temperature before beating. Cold whites take longer to reach peak volume and can result in a less stable foam. I’ve seen a friend skip this step and end up with a watery icing that never set. Warm whites whip up faster, giving you that glossy, firm finish in half the time.
Why Your Nose Knows Best
When you add the vanilla, pause and take a deep sniff. If the scent isn’t strong enough, add a few more drops – the aroma is a reliable indicator of flavor intensity. Trusting your nose beats any measurement when it comes to vanilla, especially with high‑quality extracts.
The 5‑Minute Rest That Changes Everything
After you’ve mixed everything, let the icing rest for five minutes before piping. This short break allows the air bubbles to rise to the surface and pop, resulting in a smoother finish. I once tried to pipe immediately and ended up with tiny air pockets that looked like bubbles in a soda.
The Water Drop Test
When you think the icing is ready, drop a tiny bead of water onto the surface. If it beads and rolls off without soaking in, you’ve hit the perfect consistency. If it spreads, you need a touch more sugar; if it beads but sits still, add a drop of water.
Silk‑Finish Finish
For an ultra‑silky sheen, give the icing a quick blast with a kitchen torch for just two seconds. The heat caramelizes the outermost sugar layer, creating a subtle glossy finish that looks restaurant‑grade. Use caution – you only need a flash, not a full‑on sear.
Creative Twists and Variations
This recipe is a playground. Here are some of my favorite ways to switch things up:
Citrus Burst
Swap half of the vanilla extract for fresh lemon or orange zest mixed with a teaspoon of citrus juice. The bright tang cuts through the sweetness, making it perfect for holiday sugar cookies.
Chocolate Velvet
Add two tablespoons of high‑quality cocoa powder to the powdered sugar before mixing. The result is a deep, chocolate‑kissed icing that pairs beautifully with almond or hazelnut cookies.
Spiced Autumn
Incorporate a pinch of ground cinnamon, nutmeg, and a dash of pumpkin spice into the sugar. This variation is a hit for Thanksgiving gatherings, giving the icing a warm, cozy flavor.
Minty Fresh
Replace the vanilla with peppermint extract and add a few drops of green food coloring for a festive, holiday‑themed icing that looks as good as it tastes.
Coffee Kick
Dissolve a teaspoon of instant espresso powder in the water before adding it to the mix. The subtle coffee undertone adds depth and pairs wonderfully with chocolate‑dipped cookies.
Storing and Bringing It Back to Life
Fridge Storage
Place the icing in an airtight container and store it in the refrigerator for up to five days. Before using, let it come to room temperature and give it a quick whisk to restore its glossy sheen. If it looks a bit thick, stir in a few drops of water.
Freezer Friendly
For longer storage, freeze the icing in a sealed freezer‑safe bag for up to three months. Thaw it overnight in the fridge, then bring it to room temperature and whisk gently. The texture remains intact, making it perfect for holiday prep.
Best Reheating Method
When you need to revive the icing, place the container in a bowl of warm water for a minute, then stir in a tiny splash of water (about a teaspoon). The gentle heat and added moisture bring back that silky finish without over‑liquefying the mix.