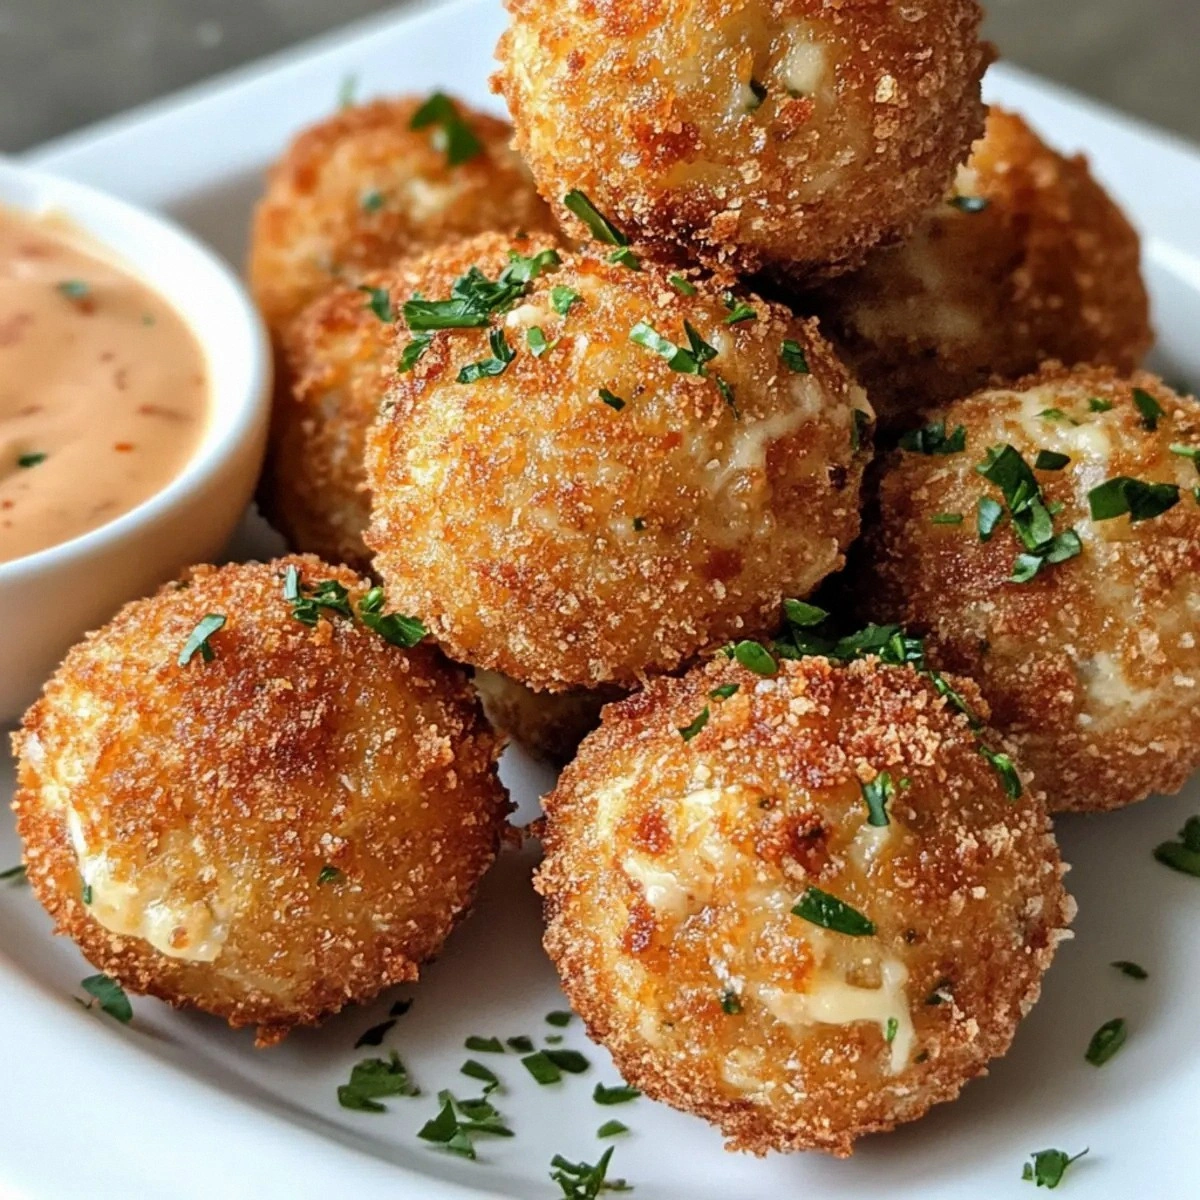
Picture this: it’s a rainy Thursday night, the kind where the world outside feels like a muted watercolor, and you’re stuck in a kitchen that smells like yesterday’s burnt toast. I was halfway through a bland, over‑cooked batch of plain meatballs when a friend dared me to reinvent the classic Reuben as a bite‑size party bomb. I laughed, I scoffed, and then I thought, “What if I could cram all that deli‑sandwich glory into a crunchy, melt‑in‑your‑mouth sphere?” That thought turned into a midnight experiment that ended with a pan full of sizzling, golden orbs that practically sang “New York, New York” as they crackled. The first bite? A perfect storm of tangy sauerkraut, buttery Swiss, and a smoky kick that made my taste buds do the cha‑cha‑cha.
From the moment the first ball hit the oil, the kitchen turned into a symphony of sounds: the hiss of hot oil like a tiny fireworks display, the soft thump of each ball sinking, and the faint pop of breadcrumbs giving way to a crisp that could rival the crunch of fresh autumn leaves. The aroma was a heady blend of salty corned beef, the sweet‑sour tang of sauerkraut, and the nutty whisper of melted cheese, all wrapped in a buttery, fried veil that made the whole house feel like a deli on a Saturday night. I could almost see the steam rising from the pan, swirling like ghostly ribbons, while the spicy Thousand Island sauce waited on the side, glossy and eager, promising a flavor punch that would hit you like a warm hug from a long‑lost cousin.
Most Reuben ball recipes either drown the beef in sauce or forget the essential crunch that makes a bite‑size snack truly addictive. This version stands out because it respects every layer of the classic sandwich, then elevates it with a few culinary tricks that most home cooks overlook. I’m talking about a secret coating technique that locks in moisture, a spice blend that adds depth without overwhelming, and a sauce that balances heat, sweetness, and acidity like a perfectly tuned orchestra. If you’ve ever struggled with soggy interiors or bland fillings, you’re about to discover the fix you didn’t know you needed.
And here’s the kicker: the secret ingredient is something you already have in your pantry, but you’ve probably never used it in this context. I’m not going to spill the beans just yet—stay tuned, because that little twist is what turns a good snack into an unforgettable experience. Let me walk you through every single step — by the end, you’ll wonder how you ever made it any other way.
What Makes This Version Stand Out
- Flavor Explosion: Each bite delivers the iconic Reuben trio—corned beef, sauerkraut, and Swiss—amplified by a smoky paprika whisper and a kiss of hot sauce that dances on the tongue.
- Crispy Armor: The double‑dip in flour and breadcrumbs creates a crust that shatters like thin ice, giving you that satisfying crunch before the creamy interior reveals itself.
- Simplicity Meets Sophistication: With just a handful of pantry staples and a few minutes of prep, you achieve a gourmet‑level appetizer that looks and tastes like it belongs on a restaurant menu.
- Unexpected Twist: The addition of cream cheese to the filling keeps the center luxuriously smooth, while the spicy Thousand Island sauce adds a zing that most recipes completely miss.
- Crowd Magnet: I dare you to taste this and not go back for seconds; even the most skeptical eaters turn into instant fans, begging for the recipe.
- Ingredient Quality: Using high‑quality corned beef and authentic Swiss cheese makes the flavor profile richer, turning a simple snack into a celebration of taste.
- Versatile Cooking Method: Whether you deep‑fry, air‑fry, or bake, the technique adapts, ensuring you get that perfect golden exterior every single time.
- Make‑Ahead Magic: These balls can be pre‑pped and frozen, then fried straight from the freezer, making them an ideal make‑ahead party hero.
Inside the Ingredient List
The Flavor Base
Corned Beef (1 cup): This is the heart of the Reuben, bringing salty, savory depth. Choose a brand that’s well‑cured but not overly sweet, because the balance of flavors is crucial. If you skip it, you lose the signature “deli” punch that makes these balls instantly recognizable. A good tip: pat the beef dry with paper towels to avoid excess moisture that can sog the coating.
Sauerkraut (1 cup): The tangy, slightly sweet crunch of sauerkraut cuts through the richness of the cheese and beef. Drain it well and give it a quick squeeze to remove excess brine; otherwise, you’ll end up with a soggy interior. If you’re not a fan of the classic cabbage tang, try a milder fermented kimchi for an Asian twist.
The Texture Crew
Shredded Swiss Cheese (1 cup): Swiss provides that mellow, nutty melt that holds the ball together. Its low moisture content means it won’t turn the mixture into a soupy mess. For a bolder flavor, swap half the Swiss for sharp cheddar, but be prepared for a sharper bite.
Cream Cheese (4 oz): This is the secret weapon that keeps the interior luxuriously creamy. It also acts as a binder, ensuring the beef and sauerkraut don’t fall apart. If you’re dairy‑free, use a plant‑based cream cheese, but expect a slightly different mouthfeel.
The Unexpected Star
Dijon Mustard (2 tbsp): Adds a subtle heat and a vinegary edge that brightens the whole mixture. It also helps the breadcrumbs adhere better during the coating stage. If you’re missing Dijon, a spoonful of whole‑grain mustard works as a decent stand‑in.
Smoked Paprika (1 tsp): This spice delivers a smoky depth that mimics the flavor of a traditional Reuben grilled on a flat‑top. It also imparts a gorgeous reddish hue to the interior, making each bite visually appealing. A pinch of cayenne can replace it if you crave extra heat.
The Final Flourish
Mayonnaise (1 cup) & Ketchup (1 tbsp) & Pickle Relish (2 tbsp): These three combine to create the spicy Thousand Island sauce. The mayo provides a silky base, ketchup adds sweetness, and relish introduces tangy crunch. Adjust the hot sauce to taste; a dash of sriracha will turn this into a fire‑starter.
Fresh Parsley (2 tbsp, chopped): Sprinkled into the sauce for a burst of fresh herbaceous flavor, it also adds a pop of color that makes the plating look restaurant‑ready. If parsley isn’t your jam, try chives or dill for a different aromatic profile.
Everything's prepped? Good. Let's get into the real action...

The Method — Step by Step
Start by gathering all your filling ingredients in a large mixing bowl. Combine the corned beef, well‑drained sauerkraut, shredded Swiss, cream cheese, and Dijon mustard. Use your hands (yes, get a little messy) to mash everything together until you have a cohesive, slightly sticky mixture. Watch the texture: it should hold together when you press a handful; if it’s crumbly, add a splash of the mayo to bind it.
Form the mixture into uniform balls about the size of a golf ball. This consistency ensures even cooking and a perfect bite‑size experience. Place the balls on a parchment‑lined tray, cover with plastic wrap, and chill for at least 15 minutes. Cold is your friend: chilling firms the balls, preventing them from falling apart during the breading process.
Roll each chilled ball first in the seasoned flour, shaking off any excess. Then dip it into a bowl of beaten eggs (2 large eggs, lightly whisked). Finally, coat it generously with breadcrumbs, pressing lightly to ensure the crumbs adhere. This triple coating creates a barrier that locks in moisture and creates that coveted crunch.
Heat 2 cups of vegetable oil in a deep, heavy‑bottomed pot to 350°F (175°C). Use a thermometer—temperature is everything. If the oil is too cool, the balls will absorb oil and become greasy; too hot, and the exterior will burn before the interior heats through.
Gently lower 4‑5 balls into the hot oil using a slotted spoon. Listen for that immediate sizzle—that sizzle when it hits the pan? Absolute perfection. Fry for 3‑4 minutes, turning once, until the crust is a deep golden‑brown and the interior is hot throughout. The edges will start pulling away from the pan, a clear visual cue that they’re ready.
Remove the balls with the slotted spoon and transfer them to a wire rack set over a baking sheet. This allows excess oil to drip away, preserving crispness. While they rest, sprinkle a pinch of smoked paprika over the tops for an extra aroma boost.
While the balls are cooling, whisk together the spicy Thousand Island sauce: combine mayonnaise, ketchup, pickle relish, hot sauce to taste, and the chopped parsley. Adjust seasoning—if you like it hotter, add more hot sauce; if you prefer a sweeter note, a drizzle of honey works wonders.
Serve the balls hot, arranged on a platter with the sauce in a shallow bowl for dipping. Encourage guests to grab a ball, dunk, and experience that first‑bite contrast of crunch, melt, and zing. And now the fun part—watch everyone’s faces light up as they discover the secret inside.
That's it — you did it. But hold on, I've got a few more tricks that'll take this to another level...
Insider Tricks for Flawless Results
The Temperature Rule Nobody Follows
Most home cooks set the oil to “medium‑high” and hope for the best. The truth? You need a steady 350°F for that perfect golden shell. Use a deep‑fat thermometer and adjust the heat as you add each batch; the oil will dip, but bring it back up quickly. I once tried to skip the thermometer and ended up with soggy, pale balls that tasted like fried dough—never again.
Why Your Nose Knows Best
Before you even taste, trust your nose. A properly fried ball releases a buttery, slightly smoky aroma that signals the crust is done. If you smell raw beef or a greasy scent, the interior hasn’t cooked through. I once relied solely on color and ended up with a half‑raw center—my nose saved the day the next round.
The 5‑Minute Rest That Changes Everything
After frying, let the balls rest on a wire rack for exactly five minutes. This short pause allows the steam inside to redistribute, keeping the interior moist while the crust stays crisp. Skipping this step results in a soggy bottom and a loss of that satisfying crunch. Think of it as a brief meditation for your snack.
Air‑Fry Alternative for the Health‑Conscious
If you’re watching oil intake, an air fryer works wonders. Preheat to 380°F, spray the coated balls lightly with oil, and cook for 12‑14 minutes, shaking halfway. The result is a slightly lighter version that still delivers that signature snap. I tried this once for a low‑calorie party and the crowd didn’t notice the difference.
Double‑Dipping for Extra Crunch
For an ultra‑crunchy exterior, dip the balls in the egg and breadcrumbs a second time after the first fry, then give them a quick 30‑second blast in the oil again. This creates a layered crust that shatters like a delicate biscuit. A friend tried this once and called it “the holy grail of fried appetizers.”
Creative Twists and Variations
This recipe is a playground. Here are some of my favorite ways to switch things up:
Spicy Jalapeño Kick
Finely dice two jalapeños and fold them into the filling. The heat pairs beautifully with the cooling cream cheese, and the bright green specks add visual excitement. Perfect for those who love a bold, tongue‑tingling experience.
Smoky Bacon Boost
Wrap each ball with a half‑slice of crispy bacon before the final breadcrumb coat. The bacon adds a smoky, salty crunch that elevates the Reuben vibe to a whole new level. Just be mindful of the extra fat—use a splatter guard while frying.
Italian Twist
Swap the Swiss for provolone, add a teaspoon of Italian seasoning to the flour, and replace the sauerkraut with marinated artichoke hearts. The result feels like a Reuben‑meets‑Caprese hybrid—unexpected but delicious.
Vegan Version
Replace corned beef with smoked tempeh, use plant‑based cream cheese, and opt for vegan cheddar. The sauce stays the same, just use vegan mayo. You’ll still get that satisfying crunch and tang without any animal products.
Sweet‑And‑Savory
Incorporate a tablespoon of honey into the breadcrumb mix and drizzle a thin honey‑glaze over the finished balls. The subtle sweetness contrasts with the salty filling, creating a sophisticated flavor dance.
Storing and Bringing It Back to Life
Fridge Storage
Place cooled balls in an airtight container lined with a paper towel to absorb excess moisture. They’ll stay fresh for up to three days. When you’re ready to serve, reheat in a hot oven at 375°F for 8‑10 minutes; the crust will revive beautifully.
Freezer Friendly
Freeze the uncooked, breaded balls on a parchment sheet, then transfer to a zip‑top bag. They’ll keep for up to two months. When you’re ready to fry, add an extra minute to the cooking time and enjoy as if they were fresh.
Best Reheating Method
For leftovers, the oven is your best friend. Preheat to 400°F, place the balls on a wire rack, and bake for 6‑8 minutes. Add a tiny splash of water to the pan before reheating; the steam helps the interior stay moist while the exterior crisps up again.