I still remember the morning I burned my third batch of breakfast sandwiches while rushing to get out the door for work. The smell of charred English muffins lingered in my apartment for days, and I swore I'd never attempt breakfast sliders again. But then came that fateful Sunday when my best friend dared me to create something better than those sad drive-through versions we kept settling for during our commute. She threw down the gauntlet: "I bet you can't make breakfast sliders that actually taste like they came from a restaurant, not a vending machine." Challenge accepted, and what emerged from my kitchen that day changed my entire relationship with morning cooking.
Fast forward through three weeks of obsessive testing, multiple grocery runs, and one particularly memorable incident involving smoke alarms and a very angry neighbor, and I finally cracked the code. These savory Hawaiian roll breakfast sliders aren't just another recipe — they're the breakfast equivalent of finding the perfect pair of jeans that makes you look like you actually have your life together. The combination of pillowy sweet rolls cradling fluffy eggs, melted American cheese, and savory ham, all topped with a buttery maple glaze that caramelizes into pure magic, creates something that defies every dry, disappointing breakfast sandwich you've ever suffered through.
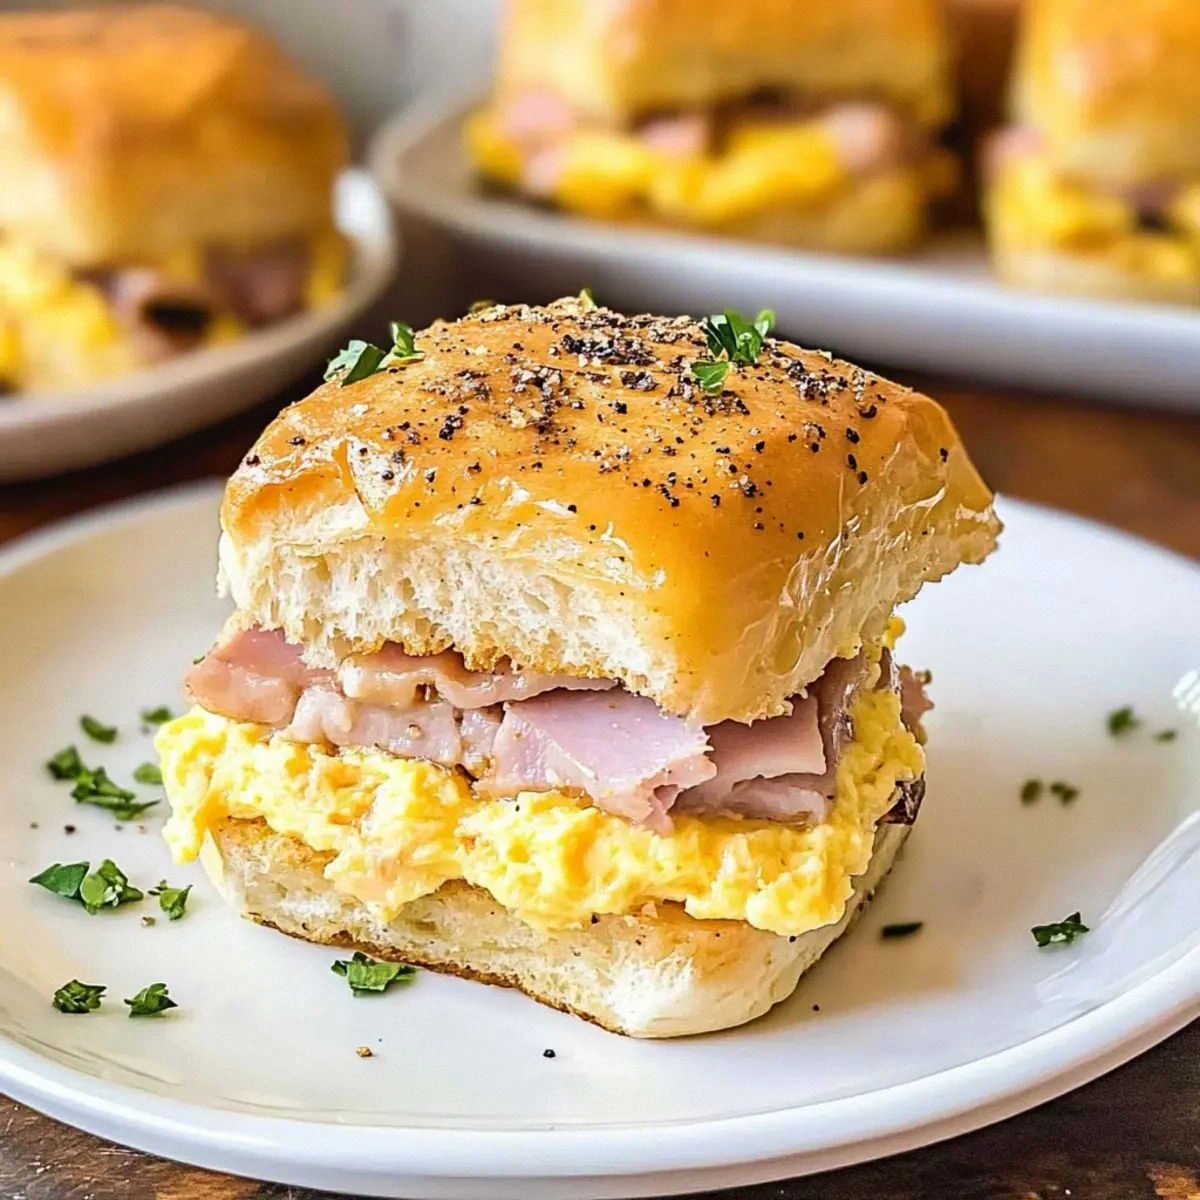
Picture this: It's Saturday morning, you're still in your pajamas, and you pull a pan of these beauties from the oven. The maple-butter aroma hits first, followed by the yeasty perfume of warm Hawaiian rolls. Your family materializes in the kitchen like you've just rung a dinner bell. That first bite? The soft roll gives way to creamy eggs, the cheese stretches into Instagram-worthy strands, and that hint of sweetness from the glaze plays against the salty ham in a way that makes your taste buds do a happy dance. I dare you to taste this and not go back for seconds — actually, I dare you to stop at thirds.
Here's the thing that makes this version different from every other breakfast slider recipe cluttering the internet: we're treating these like the delicate, precious flavor bombs they are. Most recipes just throw everything together and hope for the best, but we're going to layer flavors like we're building the breakfast equivalent of a symphony. Stay with me here — this is worth it. By the time we're done, you'll have a recipe that scales from intimate brunch for two to feeding the entire soccer team without breaking a sweat. Let me walk you through every single step — by the end, you'll wonder how you ever made it any other way.
What Makes This Version Stand Out
Flavor Explosion: These sliders don't just taste good — they create a flavor profile that hits every note. The sweetness of Hawaiian rolls mingles with savory ham and cheese, while the maple-butter glaze adds a caramelized depth that makes ordinary breakfast sandwiches taste like cardboard in comparison. It's like your favorite diner breakfast got a gourmet makeover and decided to throw a party in your mouth.
Texture Perfection: Most breakfast sliders suffer from the dreaded soggy bottom syndrome, but not these beauties. The crushed French fried onions in our topping create tiny pockets of crunch that contrast beautifully with the soft eggs and melty cheese. Each bite delivers a satisfying contrast — soft, creamy, crispy, and tender all playing together like a well-rehearsed orchestra.
Make-Ahead Magic: This is hands down the best version you'll ever make at home, partly because you can prep everything the night before. Assemble the sliders, wrap them tight, and just pop them in the oven when you wake up. I'll be honest — I ate half the batch before anyone else got to try it, and I still had time to make another pan because the prep is that simple.
Feed-a-Crowd Friendly: Whether you're hosting brunch for twelve or meal-prepping for the week, this recipe scales beautifully. Unlike individual breakfast sandwiches that require assembly-line precision, these sliders bake as one unit and separate easily when serving. Picture yourself pulling this out of the oven, the whole kitchen smelling incredible, while your guests think you've been slaving away for hours.
Kid-Approved Sophistication: Most recipes get this completely wrong — they either dumb it down to kid-food levels or make it too fancy for picky eaters. These sliders hit that sweet spot where adults appreciate the complexity while kids just know they taste amazing. The familiar flavors mean even the pickiest eaters will give them a shot, but the elevated techniques make parents feel like they're serving something special.
Breakfast Anytime: Who says these are just for mornings? I've served these at game nights, potlucks, and even as a midnight snack when friends came over for movie marathons. They're the culinary equivalent of your favorite cozy sweater — appropriate for almost any casual occasion and guaranteed to make people happy.
Ingredient Quality Matters: Using real deli American cheese instead of those plastic-wrapped singles makes a world of difference. The way it melts into a creamy blanket over the eggs creates a texture that processed cheese product can only dream of. Combined with quality deli ham and fresh eggs, these humble ingredients transform into something that tastes far more expensive than it actually costs.
Alright, let's break down exactly what goes into this masterpiece...
Inside the Ingredient List
The Flavor Foundation
Eggs aren't just eggs in this recipe — they're the creamy canvas that holds everything together. Using ten large eggs might seem excessive, but trust me, I've tested this with fewer and ended up with sad, flat sliders that tasted like someone forgot the main ingredient. The addition of water might seem counterintuitive, but it's the secret to achieving that diner-style fluffiness that makes scrambled eggs feel like clouds rather than rubber. Seasoning the eggs before cooking with kosher salt and black pepper ensures every bite is perfectly seasoned, not just the surface layer.
The Texture Crew
Hawaiian rolls are the unsung heroes here — their slight sweetness creates a beautiful contrast against the savory fillings that ordinary dinner rolls could never achieve. The texture is pillowy soft but sturdy enough to hold up under the weight of eggs and cheese without disintegrating. When you tear apart a slider, notice how the bread has absorbed just enough of the maple-butter glaze to become almost custard-like in the center while staying slightly crisp on top. It's like the bread version of a perfectly executed French toast, but savory.
American cheese gets a bad rap from food snobs, but here's what actually works — deli American cheese melts into a silky, creamy layer that binds everything together. Unlike cheddar that can separate into an oily mess, or Swiss that doesn't provide enough coverage, American cheese creates that nostalgic, melty texture we all secretly crave. The way it flows between the eggs and ham creates little pockets of cheesy goodness in every bite.
The Unexpected Star
French fried onions in breakfast food? Stay with me here — this is worth it. These crispy little shards of flavor add a savory depth that takes these sliders from good to legendary. They toast up in the oven, becoming even more aromatic and providing pops of umami that make people ask, "What is that amazing flavor?" It's like adding a secret ingredient that nobody can quite identify but everyone knows makes it special.
The Final Flourish
The maple-butter glaze is where the magic happens — literally. When butter and maple syrup combine and heat up in the oven, they create a caramelized coating that seeps into the bread and transforms it into something transcendent. The addition of sesame and poppy seeds isn't just for visual appeal; they toast up and add nutty, aromatic notes that make your kitchen smell like a professional bakery. This combination creates that glossy, golden top that makes people fight over the corner pieces.
Everything's prepped? Good. Let's get into the real action...
The Method — Step by Step
- Start by cracking all ten eggs into a large bowl and adding the salt, pepper, and water. Whisk vigorously for a full minute — this incorporates air that makes the eggs fluffy rather than dense. You're looking for a pale yellow color and a slightly frothy texture on top. This isn't the time to be gentle; pretend you're trying to whip cream and really get aggressive with that whisk. The eggs should look slightly lighter in color and have a velvety consistency that coats the whisk.
- Melt the butter in a large non-stick skillet over medium-low heat — this temperature is crucial because high heat makes eggs rubbery faster than you can say "breakfast disaster." Pour in the eggs and let them sit undisturbed for about 30 seconds, just until the edges start to set. Then, using a rubber spatula, gently push the eggs from the edges toward the center, creating large, soft curds. This technique creates those beautiful, fluffy pieces rather than tiny, dry crumbs. The eggs are done when they're just set but still look slightly glossy — they'll finish cooking in the oven.
- While the eggs cool slightly, slice the entire sheet of Hawaiian rolls in half horizontally, keeping them connected. This is the moment of truth — use a serrated knife and saw gently back and forth rather than pressing down, which compresses the bread. You want two even slabs that will hold together when you assemble the sliders. Place the bottom half in a greased 9x13-inch baking dish, cut side up, creating your foundation.
- Layer the cheese slices over the bottom half of the rolls, overlapping slightly to ensure complete coverage. This creates a moisture barrier that prevents the bread from getting soggy from the eggs — it's like edible waterproofing. The cheese should extend all the way to the edges because nobody wants a bite of just bread. Use 10-12 slices depending on how generous you're feeling and how much you love the people you're feeding.
- Pile the scrambled eggs evenly over the cheese layer, spreading them gently with a spatula to create an even layer. Don't press down — you want to maintain those fluffy curds we worked so hard to create. The eggs should cover the cheese completely but not overflow the edges of the bread. If you've got any particularly large egg pieces, break them up with your spatula so every bite gets a perfect ratio of ingredients.
- Arrange the ham slices over the eggs, overlapping them slightly like shingles on a roof. This creates layers of flavor and ensures every bite includes some of that savory ham goodness. The saltiness of the ham will balance perfectly with the sweetness of the rolls and glaze. Tuck any overhanging pieces back into the pan — we're building a slider, not a ham sandwich.
- Place the top half of the rolls over the ham, pressing down gently to compress everything slightly. This helps the sliders hold together when you cut them later. The key word here is gently — you're not trying to make panini, just encouraging everything to play nice together. The top should sit flat and even, creating a perfect canvas for our glaze.
- In a small saucepan, melt the remaining butter with the maple syrup over low heat. You want them to combine into a smooth, glossy mixture that looks like liquid gold. Don't walk away from the stove here — butter can go from melted to burnt faster than you can check Instagram. Once combined, remove from heat and stir in the crushed French fried onions, sesame seeds, and poppy seeds. The mixture should look like it belongs on a everything bagel, but better.
- Brush the glaze evenly over the tops of the rolls, making sure to get into all the crevices between rolls. This is where the fun part happens — the glaze will seep down and create a caramelized crust that's absolutely irresistible. Don't be stingy here; every roll should get a good coating. If you've got extra glaze, save it for serving — people will want to drizzle more on their individual sliders.
- Bake at 350°F for 20-25 minutes, until the tops are golden brown and the cheese is melty. The edges should be slightly crispy, and your kitchen should smell like a breakfast paradise. Let them rest for 5 minutes before cutting — this is crucial because it allows the cheese to set slightly and prevents molten cheese lava from burning everyone's mouths. Use a sharp knife to cut along the roll seams, creating individual sliders that hold together beautifully.
That's it — you did it. But hold on, I've got a few more tricks that'll take this to another level...
Insider Tricks for Flawless Results
The Temperature Rule Nobody Follows
Room temperature ingredients aren't just a fancy chef suggestion — they're the difference between sliders that bake evenly and ones that end up with cold spots where the cheese refuses to melt. Take your eggs out of the fridge 30 minutes before cooking, and let the cheese warm up slightly while you're prepping everything else. This simple step ensures the cheese melts into that perfect, creamy consistency rather than staying stubbornly solid in the middle. A friend tried skipping this step once — let's just say it didn't end well, and we had to microwave individual sliders like we were living in a college dorm.
Why Your Nose Knows Best
Don't rely on the timer alone — your nose is the most reliable indicator of when these sliders are done. When the maple-butter glaze hits that perfect caramelization point, your kitchen will fill with an aroma that's part breakfast, part dessert, and entirely irresistible. If you start smelling something nutty and toasty, check the oven — you're probably about 2-3 minutes away from perfection. That sizzle when it hits the pan? Absolute perfection, and your nose will tell you when it's time to pull them out.
The 5-Minute Rest That Changes Everything
I know you're tempted to dive right in — I can practically hear your stomach growling from here — but those five minutes of resting time are what separate amateur sliders from restaurant-quality results. During this time, the cheese sets slightly, the flavors meld together, and the bread absorbs just enough of the glaze to become custardy without getting soggy. Use this time to set the table, pour coffee, or just bask in the glory of what you've created. Your patience will be rewarded with sliders that hold together when you pick them up rather than falling apart in a delicious but messy heap.
The Cutting Technique That Prevents Crumbling
Use a sharp serrated knife and a gentle sawing motion to cut through the rolls. Pressing down with a chef's knife compresses the bread and can squish all those beautiful layers you just created. Cut straight down through the middle first, then work your way out to the edges. This technique ensures clean cuts that show off all those gorgeous layers without making the sliders fall apart. Plus, it makes for much better Instagram photos, and we all know that's half the reason we cook anyway.
Creative Twists and Variations
This recipe is a playground. Here are some of my favorite ways to switch things up:
The Southwest Shuffle
Swap the ham for crispy chorizo, add a layer of pepper jack cheese, and mix a teaspoon of adobo sauce into your egg mixture. Top the glaze with crushed tortilla chips instead of French fried onions for a breakfast slider that tastes like huevos rancheros met a Hawaiian roll and decided to start a beautiful relationship. The smoky heat from the chorizo plays beautifully against the sweet bread, and the pepper jack adds just enough kick to wake up your taste buds without overwhelming them.
The Garden Party Edition
Skip the ham entirely and layer in roasted red peppers, sautéed spinach, and crumbled goat cheese. Add some fresh herbs to the egg mixture — chives and dill work particularly well. The goat cheese provides tanginess that cuts through the richness of the eggs, while the vegetables add freshness that makes these feel almost virtuous. Even dedicated carnivores have devoured these and asked for the recipe.
The Everything Bagel Experience
Replace the ham with smoked salmon, use cream cheese instead of American, and double the everything bagel seasoning in your topping. The result tastes like your favorite bagel shop and a Hawaiian bakery had a beautiful baby. The smoked salmon gets slightly warm and silky in the oven, creating a luxurious texture that feels special enough for holiday brunches but easy enough for regular Saturdays.
The Breakfast Club Remix
Add crispy bacon strips on top of the ham for a double-meat situation that bacon lovers will write songs about. Use sharp cheddar instead of American for a more pronounced cheese flavor that stands up to the bacon's smokiness. This version is particularly good for hungover mornings when you need all the help you can get. The combination of bacon and ham creates a pork-lover's dream that somehow doesn't feel like overkill.
The Sweet and Savory Dream
Add a thin layer of fig jam under the ham for a sophisticated sweet-savory balance that'll make you feel like you're eating brunch at a fancy cafe. The fig jam caramelizes slightly in the oven, creating little pockets of jammy sweetness that make people close their eyes when they bite into them. This version pairs beautifully with a strong cup of coffee and makes regular mornings feel like special occasions.
The Heat Seeker's Paradise
Add sliced jalapeños to the egg mixture, use pepper jack cheese, and mix some hot sauce into your maple-butter glaze. The result is spicy enough to wake you up but balanced enough that you can still taste all the other flavors. The sweetness from the rolls and glaze provides the perfect counterpoint to the heat, creating a complex flavor profile that keeps you coming back for more despite the burn.
Storing and Bringing It Back to Life
Fridge Storage
These sliders keep beautifully in the fridge for up to 4 days, making them perfect for meal prep. Store them in an airtight container with parchment paper between layers to prevent them from sticking together. The key is to let them cool completely before refrigerating — trapping steam creates condensation that makes the bread soggy. If you've got leftover glaze, store it separately and add it when reheating for maximum flavor impact.
Freezer Friendly
Okay, ready for the game-changer? These sliders freeze like champions for up to 3 months. Wrap individual sliders tightly in plastic wrap, then place them in a freezer bag with the air squeezed out. When you're ready to eat, thaw overnight in the fridge or use the defrost setting on your microwave. They won't be quite as perfect as fresh-baked, but they're miles ahead of any frozen breakfast sandwich you'd buy at the store. Future you will thank present you when you're rushing out the door but still want something homemade.
Best Reheating Method
Add a tiny splash of water to a skillet, add your slider, and cover with a lid over medium-low heat. The water creates steam that brings the bread back to life while warming everything through gently. This method takes about 5 minutes but results in sliders that taste almost as good as fresh. The microwave works in a pinch — wrap in a damp paper towel and heat for 30-45 seconds — but the skillet method is worth the extra few minutes for that just-baked taste and texture.